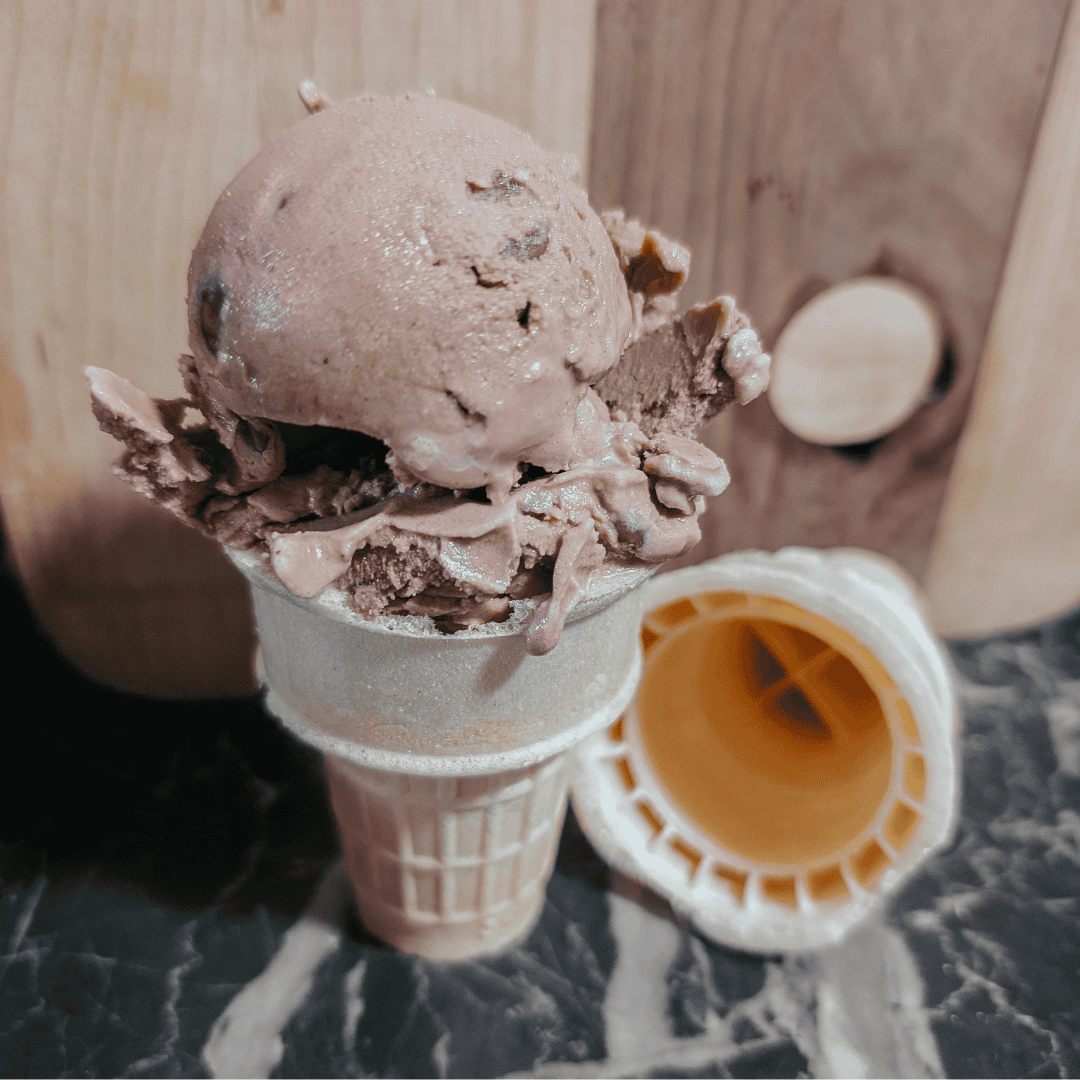
Double Chocolate Ninja Creami Ice Cream
If you’re a true chocolate lover, this Double Chocolate Ninja Creami Ice Cream is the kind of dessert that disappears quickly. Made with cocoa powder, chocolate chips, milk, half-and-half, and pasteurized egg whites, it delivers deep chocolate flavor and a creamy texture without relying on pudding mix, cream cheese, or complicated ingredients.
This recipe uses the same egg white base as my Ninja Creami Vanilla Ice Cream but transforms it into a chocolate lover’s dessert with cocoa powder and chocolate mixed throughout. The result is a smooth homemade chocolate ice cream that’s rich enough for a special treat but simple enough to make whenever a chocolate craving strikes.
One of my favorite things about this recipe is that it creates a traditional hard-packed ice cream texture after spinning. The chocolate flavor comes from real cocoa powder and chocolate chips, giving you chocolate in every bite while still keeping the ingredient list simple and affordable.
Quick Answer
This homemade chocolate ice cream recipe combines a simple chocolate ice cream base with chocolate chips to create a creamy chocolate ice cream with rich chocolate flavor and minimal effort.
Flavor:
Double chocolate
Texture:
Smooth, creamy, traditional hard-packed ice cream
Difficulty:
Easy

Prep Time:
10 Minutes
Freeze Time:
24 Hours
Yield:
1 Pint
Growing up, cocoa powder was a pantry staple in our house. We used it for hot chocolate, cakes, and just about any chocolate dessert we could think of. One thing I learned very early was that cocoa powder doesn’t always cooperate if you simply dump it into liquid. It has a tendency to float, clump, and leave little pockets of dry cocoa behind.
That experience is the reason I still take a few extra minutes to whisk cocoa powder into warm cream before making recipes like this one. The extra step creates a smoother chocolate base and helps distribute the chocolate flavor more evenly throughout the ice cream.
For me, this is the kind of dessert that comes out when the chocolate lovers are visiting. It’s rich enough to feel like a treat but simple enough to make whenever a chocolate craving strikes.
Cost Rating: 🍳🍳🍳 3 Pans — Moderate (Yield 1 Pint)
Cost Guideline:
Cost Per Batch: ~$2.50–$4.00
Cost Per Serving: ~$0.30–$0.50 (based on 8 servings)
Most of the cost comes from the cocoa powder and chocolate chips. While the milk, half-and-half, pasteurized egg whites, and sugar are relatively inexpensive per batch, specialty cocoa powders and chocolate products can increase the overall cost of the recipe.
To keep costs lower, use regular grocery store cocoa powder and standard chocolate chips. The flavor will be slightly different, but you’ll still end up with a rich homemade chocolate ice cream with plenty of chocolate flavor.
Why You’ll Love This Double Chocolate Ninja Creami Ice Cream
Rich Chocolate Flavor: Cocoa powder and chocolate chips create chocolate flavor throughout the entire pint.
No Pudding Mix Required: This recipe relies on simple ingredients rather than boxed pudding mixes.
Creamy Texture: The egg white base creates a smooth texture without requiring cream cheese.
Easy To Customize: Add your favorite mix-ins to create endless chocolate variations.
Uses Pantry Ingredients: Most of the ingredients are commonly found in home kitchens.

Budget Tip:
The most expensive ingredients in this recipe are the cocoa powder and chocolate chips. To reduce costs, use regular cocoa powder from your pantry instead of specialty cocoa powders and choose store-brand chocolate chips rather than premium chocolate products.
If you’re buying cocoa powder from a bulk food store, purchasing only the amount needed for the recipe can be much more economical than buying a full package. Watching for sales on half-and-half, milk, and chocolate chips can also help lower the overall cost.
For an even more budget-friendly version, skip the chocolate chips entirely or replace them with a lower-cost mix-in you already have on hand.
How To Make Double Chocolate Ninja Creami Ice Cream
Add ½ cup of the half-and-half to a small saucepan and place it over medium-low heat. Once warm, whisk in the cocoa powder. Continue whisking until the cocoa is completely incorporated and no dry pockets remain. You’re not trying to boil the mixture or reduce it. The goal is simply to create a smooth chocolate mixture that allows the cocoa powder to fully hydrate.


Remove the saucepan from the heat and allow the chocolate mixture to cool while you prepare the rest of the base.
In your Ninja Creami Deluxe pint container, combine the pasteurized egg whites, sugar, and remaining ½ cup of half-and-half. Using a small drink frother or mini immersion blender, blend until the sugar begins to dissolve.


Once the cocoa mixture has cooled, scrape it into the pint container. The mixture will likely be much thicker than when it first came off the stove, which is completely normal. Blend again until the chocolate mixture is fully incorporated and smooth.


Add the milk and vanilla extract. Blend briefly one final time until everything is evenly combined. Avoid overmixing, as dairy products can trap excess air and create bubbles on the surface.


Make sure the mixture remains below the max fill line. Secure the lid and freeze on a level surface for a full 24 hours.
For the best results, freeze the pint on a completely level surface and allow the full 24-hour freeze time. Processing a partially frozen base can affect the final texture and make it harder for the Ninja Creami to create a smooth, creamy ice cream.


Once frozen solid, remove the lid and place the pint container into the outer bowl. Secure the outer bowl lid according to the manufacturer’s instructions and install the bowl assembly into the Ninja Creami machine.
Process using the Ice Cream function. After the first spin, don’t be surprised if the ice cream looks extremely powdery. Mine did too.


If you’re planning to add chocolate chips or other mix-ins, create a small well in the center of the ice cream according to the manufacturer’s directions. Add your mix-ins and run the Mix-In setting.
Adding chocolate chips after the first spin creates the second layer of chocolate flavor that gives this recipe its double chocolate name. The chips remain slightly firm after freezing and provide little bursts of chocolate throughout the creamy ice cream.
One thing I discovered with this recipe is that there is usually no need to run a respin before adding mix-ins. The Mix-In cycle provides additional processing and is often enough to bring the ice cream together.
If you’re not adding mix-ins and the ice cream still appears loose, dry, or powdery after the first spin, run a respin. In most cases, the second spin is enough to create a smooth, creamy texture similar to traditional hard-packed chocolate ice cream.
Don’t be surprised if the surface still looks slightly powdery in places. This ice cream base can appear drier than it actually is, but if it scoops smoothly and presses together easily with a spoon, it’s ready to enjoy.
Ingredients
This Double Chocolate Ninja Creami Ice Cream combines a simple chocolate ice cream base with chocolate chips to create a creamy homemade ice cream with rich chocolate flavor and minimal effort.
Pasteurized Egg Whites: Add protein and improve texture without requiring cream cheese. They help create a creamy texture while keeping the ice cream base simple and easy to prepare. Many Ninja Creami recipes rely on cream cheese, cottage cheese, or pudding mix for body, but I prefer egg whites because they create a smooth chocolate ice cream base with a shorter ingredient list.
Half-And-Half: Provides richness and creaminess without creating the heavier mouthfeel that can sometimes occur when using heavy cream. Combined with the milk, it helps create a smooth base for homemade ice cream.
3.25% Milk: Helps create a balanced ice cream base with a smooth texture. I use 3.25% whole milk because it contributes to the creamy consistency without making the finished ice cream overly rich.
White Sugar: Sweetens the chocolate base without making it overly sweet.
Red Alkalized Cocoa Powder: Provides the primary chocolate flavor and gives this recipe its deep chocolate flavor. Heating the cocoa with warm cream helps distribute it evenly throughout the ice cream mixture.
Vanilla Extract: Enhances the chocolate flavor and helps create a richer chocolate flavor. Even a small amount makes a noticeable difference in the finished ice cream.
Chocolate Chips: Create the second chocolate component that gives this recipe its double chocolate name. The chocolate chips stay firm after freezing and provide little bursts of chocolate throughout the ice cream, creating an even richer chocolate experience for chocolate lovers.
Substitutions, Add-Ins and Variations for Double Chocolate Ice Cream
Regular Cocoa Powder: If you don’t have red alkalized cocoa powder, regular cocoa powder can be used instead. The finished color and flavor will be slightly different, but the recipe will still produce a rich chocolate ice cream.
Chocolate Chips: Use any chocolate chips you enjoy eating. Milk chocolate, semi-sweet, dark chocolate, mini chocolate chips, or chopped chocolate bars all work well.
Vanilla Extract: Pure vanilla extract or artificial vanilla extract can both be used. The vanilla helps strengthen the chocolate flavor rather than overpowering it.
Different Chocolate Mix-Ins: Try white chocolate chips, peanut butter chips, cream cheese chips, chocolate chunks, or chopped candy bars.
Rocky Road Variation: Add mini marshmallows and chopped nuts along with the chocolate chips for a rocky road-inspired version.
Cookie Lover’s Version: Mix in crushed chocolate sandwich cookies or pieces of edible cookie dough after the first spin.
Extra Chocolate Version: Drizzle chocolate sauce into the well before running the Mix-In setting for even more chocolate flavor.
Expert Tips, Serving and Storing Suggestions for Chocolate Ice Cream
TIP #1: Heat The Cocoa First: Mixing cocoa powder into warm cream creates a smoother base and helps prevent lumps.
TIP #2: Don’t Panic After The First Spin: This recipe tends to look very powdery after the first spin, but that doesn’t mean anything is wrong.
TIP #3: Use The Mix-In Setting Strategically: If you’re adding chocolate chips, there’s usually no reason to run a respin first.
TIP #4: The Powder Is Still Ice Cream: When creating a well for mix-ins, don’t throw away the powdery ice cream you remove. Once pressed together, it becomes smooth and creamy. I usually eat it while adding the mix-ins.
TIP #5: Create A Flat Surface Before Refreezing: If you plan to store leftovers, smooth the surface before returning the pint to the freezer.
This is the kind of dessert I make for true chocolate lovers. The combination of cocoa powder and chocolate chips creates a rich chocolate ice cream that’s perfect for movie nights, summer barbecues, or whenever a chocolate craving strikes.
Serve it on its own or topped with homemade chocolate sauce, cherry sauce, or caramel sauce. It also pairs well with apple pie and makes a great addition to homemade banana splits. If you enjoy Ninja Creami recipes, be sure to try my Ninja Creami Vanilla Ice Cream recipe as well.
If you enjoy making frozen desserts, be sure to try my Ninja Creami Vanilla Ice Cream as well. The two flavors pair perfectly together in sundaes, milkshakes, and banana split recipes.
Store leftover ice cream in the original Ninja Creami pint container with the storage lid attached. Before returning it to the freezer, smooth the surface with the back of a spoon or scoop to create a flat surface for future processing.
Looking for more Ninja Creami recipes? Try my Maple Walnut Ice Cream with maple sugar, or Rum Raisin Ice Cream. Once you become comfortable with the basic ice cream base, it’s easy to create different flavors using the same process.
FAQ

Double Chocolate Ninja Creami Ice Cream
Equipment
- Ninja Creami Deluxe
- Small Saucepan
- Ice Cream Scoop
- Milk frother/ Mini immersion blender
- Tablespoon
- Teaspoon
Ingredients
- ½ Cup Half and Half Cream (for heating with cocoa powder)
- 4 Tbsp Red Alkalized Cocoa Powder
- ¼ Cup Egg Whites Pasteurized
- ½ Cup Half and Half Cream
- ¼ Cup White Sugar
- 1 Cup Milk 3.25%
- 1 Tsp Vanilla Extract
- ¼ Cup Chocolate Chips Optional
Instructions
- Add ½ cup of the half-and-half to a small saucepan over medium-low heat.½ Cup Half and Half Cream
- Whisk in the cocoa powder and continue whisking until completely smooth and fully incorporated. Do not boil.4 Tbsp Red Alkalized Cocoa Powder
- Remove from the heat and allow the chocolate mixture to cool.
- In a Ninja Creami Deluxe pint container, combine the pasteurized egg whites, remaining ½ cup half-and-half, and sugar.¼ Cup Egg Whites, ½ Cup Half and Half Cream, ¼ Cup White Sugar
- Using a small drink frother or mini immersion blender, blend until the sugar begins to dissolve.
- Add the cooled cocoa mixture to the pint container and blend again until smooth.½ Cup Half and Half Cream, 4 Tbsp Red Alkalized Cocoa Powder
- Add the milk and vanilla extract. Blend briefly until evenly combined.1 Cup Milk, 1 Tsp Vanilla Extract
- Ensure the mixture remains below the max fill line.
- Secure the lid and freeze on a level surface for 24 hours.
- Remove the lid and place the frozen pint into the Ninja Creami outer bowl. Secure according to the manufacturer's directions.
- Process using the Ice Cream setting.
- If adding chocolate chips, create a small well in the center of the ice cream, add the chocolate chips, and run the Mix-In setting.
- If not using mix-ins and the ice cream remains dry or powdery after the first spin, process using the Re-Spin function.
- Serve immediately or return to the freezer for later.
Notes
- Heating the cocoa powder with part of the cream helps prevent lumps and creates a smoother chocolate base.
- A powdery first spin is common with this recipe and does not necessarily indicate a problem.
- If using mix-ins, there is usually no need to run a respin before using the Mix-In setting.
- Regular cocoa powder may be substituted for red alkalized cocoa powder.
- Any chocolate chips can be used, including milk chocolate, semi-sweet, dark chocolate, or mini chocolate chips.
- Before refreezing leftovers, smooth the surface with the back of a spoon to create a flat surface.