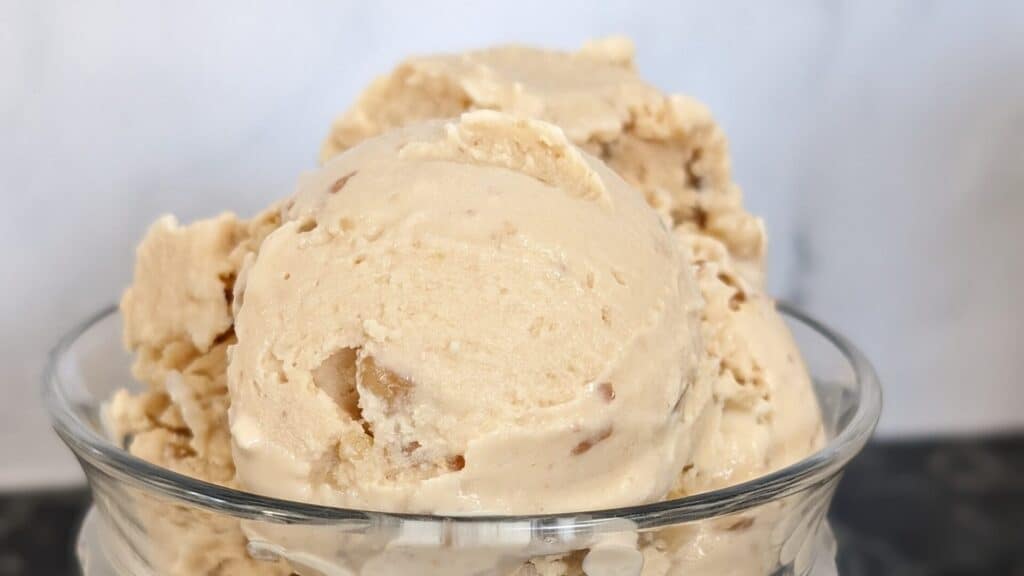
Maple Walnut Ice Cream With Maple Sugar (Ninja Creami)
Nothing quite beats homemade churn ice cream, where simplicity meets indulgence. In this recipe, we’re ditching artificial flavors and syrups in favor of the real deal – pure maple sugar. With the Ninja® CREAMi® Deluxe machine by your side, we’ll churn out a batch of creamy Maple Walnut Ice Cream to satisfy your sweet cravings. The simple six-ingredient ice cream will satisfy all maple walnut ice cream fans.
My partner loves maple walnut ice cream and eats it by the tub. I know that’s a whole lot of sugar. This is why I thought, why not make it in my new Ninja® CREAMi® Deluxe 11-in-1 Ice Cream and Frozen Treat Maker that I got as a gift. It is a straightforward machine and process to make pint-full after pint-full of creamy ice cream. As a Canadian, I knew maple seemed perfect for our blog’s first ice cream recipe. With spring around the corner, maple syrup is on the mind of most Canadians. Whether you are just looking forward to the all-you-can-eat pancake breakfasts or are heading out to the local maple sugar bush, this sticky, sweet treat is a part of our culture.
The fact that we can use maple sugar in this recipe is exciting. Maple sugar contains vitamins and minerals, making it a healthier substitute for refined white sugar in ice cream. It also adds its own deep maple flavor to the ice cream without adding artificial maple extract.
Quick Answer
Maple Walnut Ice Cream is a classic ice cream flavour made with rich maple syrup and crunchy walnuts. This Ninja Creami version creates a smooth, creamy texture with simple ingredients while delivering the old-fashioned maple flavour many people remember from premium ice cream shops.
Skill Level:
Beginner friendly
Special Ingredient:
Yes, real maple sugar
Prep Time:
5 minutes
Yield:
1 Ninja Creami Pint
Freeze Time:
24 hours
Lower Cost Version?
Yes, try the maple version with extract instead! (Click image to left)
Why You’ll Love This Ninja Creami Maple Walnut Ice Cream
Nostalgic Ice Cream Flavor: Maple walnut ice cream is an older classic ice cream flavor that feels familiar and traditional compared to many newer overloaded ice cream combinations. The maple and walnut pairing keeps the flavor simple while still giving the ice cream enough texture and richness to feel satisfying.
Real Maple Flavor: This recipe uses real maple sugar instead of artificial maple flavoring, which gives the ice cream a deeper maple taste that stays noticeable even after freezing.
Better Control Over Sweetness: Homemade maple walnut ice cream makes it easier to control the sweetness level compared to many store-bought maple ice creams that rely heavily on syrups or artificial flavors.
Cost Rating: 🍳🍳🍳 3 Pan — Premium Homemade Treat
Cost guideline:
Estimated Cost Per Pint: ~$6–$10 CAD
Cost Per Serving: ~$1.50–$2.50 CAD (4 small servings per pint)
The most expensive ingredient in this Ninja Creami maple walnut ice cream is the real maple sugar. Prices can vary depending on the maple producer, with smaller local producers often charging more for small-batch maple sugar products. A 500g bag of maple sugar in Canada is commonly around $15 and can make multiple pints of ice cream.
Cream, milk, and walnuts also contribute to the overall cost, although buying larger containers of dairy products usually lowers the price per batch. Since only small amounts of cream cheese and maple sugar are used per pint, the cost spreads out over several recipes if you regularly make homemade ice cream.
Compared to premium store-bought maple walnut ice cream, homemade Ninja Creami ice cream can still be fairly economical once the pantry ingredients are already in the kitchen.
More Ninja® CREAMi® Recipes You’ll Love
- Blueberry Ninja Creami ice cream
- Nutella mocha ice cream
- Fudgy Biscoff ice cream
- Rum Raisin
- Simple Banana Ice Cream
- Blue Raspberry
- Ninja Creami Chocolate Coffee Bean Ice Cream
- Taro Blackberry Luxurious Ice Cream
- Strawberry Rhubarb Ice Cream
- more flavors added all year round!

Budget Tip:
Buying 1L containers of 18% cream and 2L jugs of homogenized milk is usually more cost effective than purchasing smaller containers if you make homemade ice cream regularly. Maple sugar also stores well when sealed tightly, so one bag can make several batches of Ninja Creami maple walnut ice cream.
If you want to lower the cost slightly, store-brand cream cheese works well in place of Philadelphia cream cheese without greatly affecting the creamy texture of the finished ice cream.
How to Make Ninja Creami Maple Walnut Ice Cream
First, you must purchase maple sugar and the regular ice cream ingredients required for the Ninja® CREAMi®. I used a local maple producer maple sugar, Rose Valley Maple Syrup, in Laird, Ontario. Their product was both reasonably priced and delicious. Coming in a package of 170 grams means I can make more than one pint of this flavorful ice cream.
You can also purchase natural maple sugar right on Amazon. I have also used some I found at the local grocery store before. Wherever you choose to get your maple sugar, ensure it’s sealed well between uses. Moisture will wreak havoc on the quality of the product. If it’s sealed, you can safely store granulated maple sugar for up to two years.
To begin, let’s get all of the ingredients ready. In this maple walnut ice cream recipe, we are using cream cheese, maple sugar, heavy cream, and whole milk, and we’ll add the walnuts, but not until the next day. We’ve omitted the vanilla extract in this recipe because we want the flavor to come entirely from the maple sugar. This list of simple ingredients will result in some excellent maple ice cream.


In a medium bowl, add the softened cream cheese. CREAMi® prep tip: It’s easiest to nuke the cream cheese for 10 seconds to make blending with the sugar and other ingredients easier. You can reasonably mash the maple sugar and cream cheese using a fork. I am a big proponent of doing things by hand, as that is how I learned to bake so many years ago. Simple tools and simple ingredients are a path to simple success most times.


Add the heavy cream once you’ve blended the sugar into the cream cheese. I use whipping cream or 35% cream here. It’s a lot of richness, but it’s so worth it in the end. Using a whisk, work the sugar mixture into the heavy cream. That sugar needs to dissolve before you add it to the pint. While working the mixture, you can add in the whole milk. Homogenized milk, as it was once called, is now referred to as 3.25% milk for whatever reason, so that’s what you will look for in the store.
After adding the cream and the milk and working the sugar in, it’s time to fill the pint container that came with your ice cream machine. Pour the mixture in. If you’ve measured everything correctly, it should fill just to the max fill line. Pop the plastic lid on the pint and place level in your freezer for 24 hours. This will allow the mixture to freeze all the way through. Yes, it’s a long time, but it’s perfect if you have ice cream flavors on rotation like I do. In fact, stay tuned because the following recipe will be forthcoming shortly.


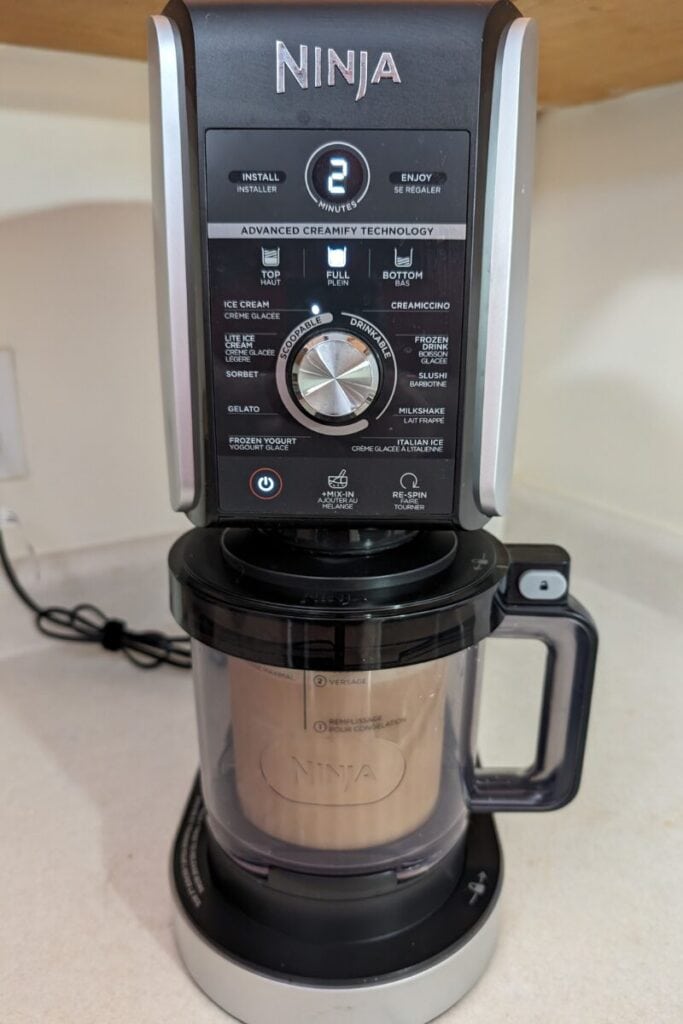

What about the walnuts? They are the last step in this Ninja® CREAMi® ice cream recipe. So, let’s get back to it. After 24 hours, remove the pint from the freezer. Following the steps to assemble the ice cream bowl assembly and position it on the Ninja® CREAMi® machine, you will select the ice cream function. The machine will mix your ice cream, and then you can remove it and open it. You will find the maple ice cream seems ‘dry’ looking after its first churn. It will come together well once you’ve added the walnuts. Remove the lid assembly from the outer bowl lid. Then, the lid from the ice cream pint. Using a spoon, dig down into the center of the maple ice cream. What do I do with the extra ice cream I am removing? Why eat it, of course! Warning: it’s freezing. So, if you are prone to brain freeze, put it in a small bowl while you work to enjoy it afterward.


Once you have dug down into the center of the ice cream so that you have approximately a four cm or one-and-a-half-inch wide hole by 8 cm deep or two inches, you can plop in two Tablespoons of chopped walnuts. Replace the lid on the pint, place the pint back in the outer bowl, and return the lid assembly. Place the bowl assembly back on the ice cream machine for the last time. Select the ice cream mix in the setting. It’s located near the power button. The Ninja® CREAMi® ice cream maker will now do its magic and add a creamy texture to your ice cream.
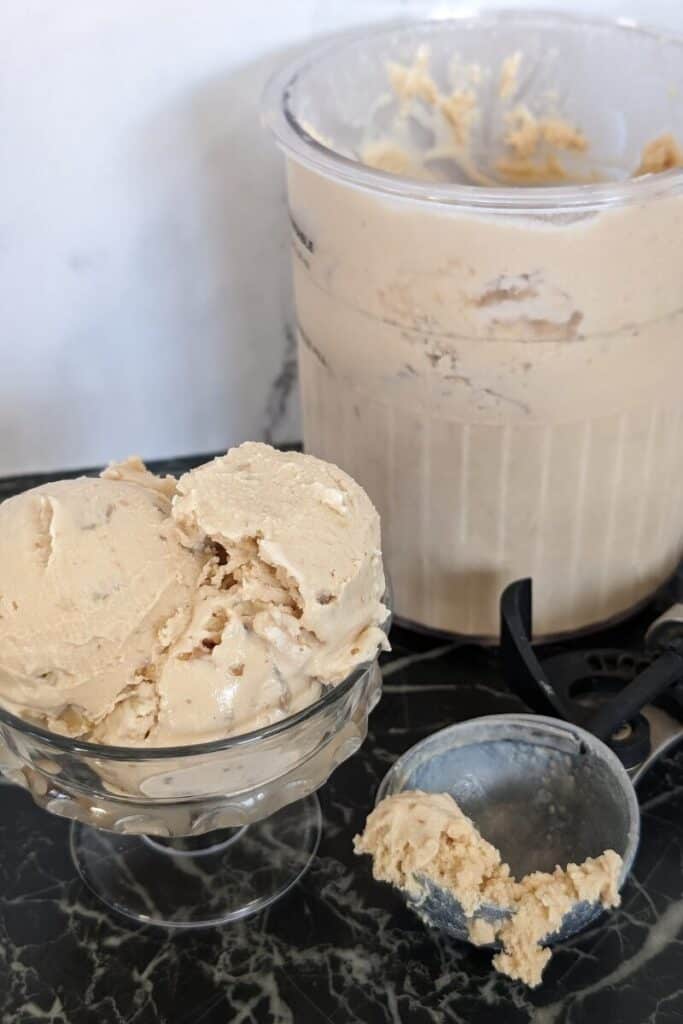
If you are not eating this ice cream immediately, place the pint back in the freezer until ready to scoop. With seriously smooth flavors from the maple sugar and the crunchy walnuts, this is the best way to enjoy the classic ice cream flavor.

This Ninja Creami maple ice cream can also be made without the walnuts if you prefer a smoother maple ice cream texture.
Ingredients:
Cream Cheese: Frequently used in ice cream bases, cream cheese creates a smooth base and creamier mouthfeel to ice cream recipes. Cream cheese adds a subtle tanginess and depth of flavor to the ice cream base, complementing the maple’s sweetness and the walnuts’ nuttiness.
Maple Sugar: Not only does this sweeten the mixture, it also infuses it with the rich, unmistakable taste of maple. The maple sugar also adds vitamins and minerals to the mix for a healthier option over refined white sugar.
Heavy Cream: This thick, high-fat dairy product is generally sold in Canada as 35% whipping cream. It’s ideal for making a smooth, rich ice cream at home.
Whole Milk: This 3.25% milk, sometimes sold as homogenized or homo milk, has a velvety smooth texture which is lighter than heavy cream. Used in this ice cream recipe, it helps develop the creamy treat, balancing the fat to milky flavor.
Chopped Walnuts: Bring an earthiness to the classic maple and walnut flavor pairing.
Vanilla Extract: Using vanilla extract enhances the flavors in the ice cream.

Substitutions and Add-Ins
Cream Cheese: If you want to use something other than cream cheese as the base, you can substitute silken tofu. It’s important to note that, like cream cheese, silken tofu contains protein, which can help stabilize the ice cream mixture and prevent it from becoming icy or grainy during freezing. However, it may not provide the same level of stabilization as cream cheese, so you may need to adjust the recipe or use additional stabilizers if necessary. Another choice would be to use vegan cream cheese. This plant-based ingredient is designed to mimic the taste and texture of traditional cream cheese.
Maple Sugar: This can be subbed out for white sugar and maple extract instead. However, maple extract will result in a different flavor, depending on how much is used and its overall strength to create a balanced maple flavor. You could alternatively use real maple syrup to get that maple flavor. Start by adding a modest amount of maple syrup to your ice cream base, such as 1/4 to 1/2 cup, depending on your desired level of sweetness and maple flavor. Remember that maple syrup is liquid, so adding too much can affect the texture of the ice cream. Brown sugar would not be a good substitute as it is made with molasses, resulting in the molasses flavor vs maple flavor.
Heavy Cream: This creates that rich, creamy texture in the ice cream. It can be replaced with cashew cream if you need a non-dairy alternative. Cashew cream is made by blending soaked cashews with water until smooth and creamy. Cashew cream has a neutral flavor, making the maple sugar shine and creamy texture. Another non-dairy alternative would be unsweetened coconut cream; remember that this will impart a distinct coconut flavor. While that will complement the maple and walnuts, it won’t be a strictly maple walnut ice cream recipe.
Whole Milk: Can be replaced with non-dairy alternatives like cashew milk, coconut milk, oat milk, or even almond milk. When choosing a non-dairy milk alternative for your ice cream recipe, consider the flavor and texture you want to achieve and any dietary preferences or restrictions. Experiment with different options to find the perfect combination that suits your taste preferences and creates a deliciously creamy, non-dairy maple walnut ice cream.
Chopped Walnuts: These are, of course, the perfect pairing with the maple flavor. However, pecans are a close second if you don’t like walnuts. Pecans are slightly sweeter, meaty nuts that bring the same crunchiness to your creamy ice cream base.
Vanilla Extract: If you want to create a more intense maple flavor replace the vanilla extract with maple extract.
Are you still looking for more variations? Try adding in some mini chocolate chips. Use half chopped walnuts and half mini chocolate chips for a delicious twist on this classic flavor pairing.
Expert Tips, Serving and Storing Suggestions
Tip#1: Fill the Ninja® CREAMi® pint only after the max fill line.
Tip#2: When you remove the pint from the freezer, ensure that the ingredients are frozen in the pint. If you have any unforeseen lumps or bumps, attempt to smooth them before mixing.
Tip#3: Do not overfill the pint with walnuts when adding the mix-ins. For best results, follow the directions with the Ninja® CREAMi® for mixing in add-ins.
Serve this creamy homemade ice cream scooped into a fancy dish for an after-dinner treat or a big bowl for a night of watching TV. The pint won’t last long, with its rich and flavorful maple walnut contents satisfying you when the craving strikes.
One way I like to make this dessert even more of a treat is to use some ripe bananas with a scoop of this ice cream for a new take on the banana split. It’s also a great way to include bananas in the diet.
Store unused ice cream in an airtight freezer container in the freezer for later use. To enjoy it from the freezer, let the pint come to room temperature for a bit, as it is a firm ice cream when frozen. Alternatively, you can remix using the Ninja® CREAMi® machine, but be sure the contents of the pint are level as per the instructions before you begin and not above the max fill line.
You can also freeze directly in the Ninja® pint if you don’t need it immediately. Ninja® ice cream can stay fresh in the freezer for two weeks. But let’s be honest, you don’t need to make this creamy homemade treat to keep for weeks. Enjoy the sweet maple walnut ice cream this time of year as a tribute to the maple syrup producers!
FAQ

Easy Ninja® CREAMi® Maple Walnut Ice Cream With Maple Sugar
Equipment
- Ninja® CREAMi® Deluxe 11-in-1 Ice Cream and Frozen Treat Maker Or other ice cream maker. Follow the directions for your churn and adjust measurements as needed.
- 1 Tablespoon
- 1 mixing bowl
- Freezer
- 1 Small Microwaveable Bowl optional
- Microwave optional
Ingredients
- 1½ Tbsp Cream Cheese *Softened
- ½ Cup Real Maple Sugar
- 1½ Tsp Vanilla Extract
- 1 Cup 35% Heavy Cream
- 1½ Cup Homogenized 3.25% Milk
- 2 Tbsp Chopped Walnuts
Instructions
- In a microwaveable bowl soften the cream cheese for ten seconds. (If not using microwave bring cream cheese to room temperature to make it softer to work with.)1½ Tbsp Cream Cheese
- Add the softened cream cheese to mixing bowl.
- Measure the maple sugar and vanilla in.½ Cup Real Maple Sugar, 1½ Tsp Vanilla Extract
- Blend the cream cheese, sugar, and vanilla until smooth.
- Add the heavy cream and whisk continually. The sugar needs to dissolve in the cream.1 Cup 35% Heavy Cream
- Measure and add the homogenized milk whisking continually.1½ Cup Homogenized 3.25% Milk
- Continue to whisk until the sugar is fully dissolved.
- Pour the ice cream base into the Ninja® CREAMi® pint being careful to not go over the max fill line.
- Place the lid on the pint and freeze level in the deep freeze for 24hrs.
- After 24 hrs remove from the freezer and assemble in the Ninja® CREAMi® machine as instructed in manual.
- Set to ice cream blend full. The machine will churn the ice cream.
- When finished remove the pint and the lid.
- Dig out the center of the ice cream to a four cm or one-and-a-half-inch wide hole by 8 cm deep or two inches.
- Add into the hole two tablespoons chopped walnuts.2 Tbsp Chopped Walnuts
- Place lid back on the pint and return to the ice cream machine as instructed.
- Set the ice cream setting to mix-in and let the machine work its magic!
- Remove churned ice cream and enjoy.
- Store unused portions in the freezer for up to two weeks.
Notes
Notes
- Freeze the Ninja Creami pint on a level surface so the machine can process the ice cream base evenly.
- The first spin may look slightly crumbly before the mix-in cycle smooths the texture out.
- Add the chopped walnuts after the first spin so they keep more crunch in the finished ice cream.
- Maple sugar gives the ice cream a deeper maple flavor than maple syrup alone.
- Cream cheese helps the ice cream stay smoother and less icy after freezing.
- If the ice cream becomes too firm after refreezing, a small splash of milk during the re-spin can help soften the texture.