How to Make Pumpkin Puree From a Regular Pumpkin
Learning how to make pumpkin puree is a great way to use a regular fall pumpkin instead of letting it go to waste once pumpkin season is over. You don’t need to start with a small pie pumpkin, either. A large, regular pumpkin can be roasted until tender, peeled and blended into homemade pumpkin puree that you can use for baking, soups, pancakes and plenty of other recipes.
Growing up off-grid, we grew pumpkins ourselves. We weren’t always successful—some years gardening works better than others—but when we did get pumpkins, we definitely made use of what we grew.
That’s still how I look at a pumpkin today. If I have a perfectly good whole pumpkin sitting there after fall, I don’t want to throw it away simply because it isn’t labelled a “pie pumpkin.”
Regular pumpkins can be a little more watery and stringy than smaller sugar or pie pumpkins, but that doesn’t mean you can’t cook with them. You just need to know how to roast them, puree the flesh and adjust the consistency if necessary.
Method:
Oven roasted (whole pumpkin in pieces)
Roasting Time:
40-45 Minutes
Oven
temperature:
350°F
Yield:
Will depend on size of the pumpkin made
Puree Method:
Food processor
Freezer Friendly:
Yes, up to six months.
This method leaves the pumpkin completely plain, so you can decide later whether that puree is becoming pumpkin muffins, soup, pumpkin bread, pancakes, cookies or even a pumpkin spice latte.
Can You Make Pumpkin Puree From a Regular Pumpkin?
Yes, you can.
A regular pumpkin—the larger type commonly sold for fall decorating or carving—is still a pumpkin. The main difference is that these pumpkins are generally bred for size and appearance rather than dense, sweet flesh.
That means your homemade puree may not look exactly like canned pumpkin.
A pie pumpkin usually produces thicker, darker and somewhat sweeter puree. Don’t worry if your finished puree isn’t as dark orange as canned pumpkin. Fresh homemade puree can be more golden in colour, and a regular pumpkin may be lighter still.
Neither of those things means you need to throw it away.
For soups, stews, sauces and similar recipes, a slightly thinner puree isn’t usually much of an issue. When you’re baking, you may simply need to drain some excess moisture until the homemade puree is closer to the consistency of canned pumpkin.
This article is really about using the pumpkin you already have.
Don’t Use a Pumpkin That Has Already Been Carved
There is an important difference between using an intact fall pumpkin and trying to salvage an old jack-o’-lantern.
This method is for a whole, uncarved pumpkin that is still firm and in good condition. Avoid pumpkins with soft spots, mold, deep damaged areas or other signs that the flesh is beginning to break down. Once a pumpkin has been carved and left sitting at room temperature or outdoors, I would not bring it back into the kitchen to make puree.
Once you’ve carved a pumpkin and left the exposed flesh sitting at room temperature or outdoors, it becomes much more perishable. That isn’t the pumpkin I would bring back into the kitchen and turn into puree.
If you’re planning to eat your fall pumpkin, cook it while it is still intact and in good condition.
Why You’ll Love Making Homemade Pumpkin Puree
You aren’t limited to pie pumpkins. This method gives you a practical way to use the large pumpkin you already bought or grew. Often larger pumpkin are cheaper to buy then a pie pumpkin as well.
It also reduces waste. The flesh becomes puree, and the seeds can be cleaned and roasted separately instead of being thrown away.
Making the puree plain also gives you far more flexibility. I don’t add pumpkin spice, sugar, salt or any other seasoning before freezing it. Later, I can turn the same puree into a sweet baked recipe or use it in a savory soup.
Freezer-friendly. And because one large pumpkin can produce quite a bit of puree, freezing it gives you a homemade ingredient ready for several future recipes instead of trying to use the entire pumpkin in one weekend.
What You Need
You don’t need much to make homemade pumpkin puree.
You’ll need one whole regular pumpkin, a sharp sturdy knife, a large spoon, a large baking sheet, parchment paper if you have it, an oven-safe 9×13-inch dish for water, a paring knife, a large bowl and a food processor or strong blender.
I use a butcher’s knife for cutting my pumpkins and a Ninja food processor for pureeing the cooked flesh.
The important thing is to use a knife that is sharp enough for the job and that you can control comfortably.
How to Make Pumpkin Puree From Fresh Pumpkin
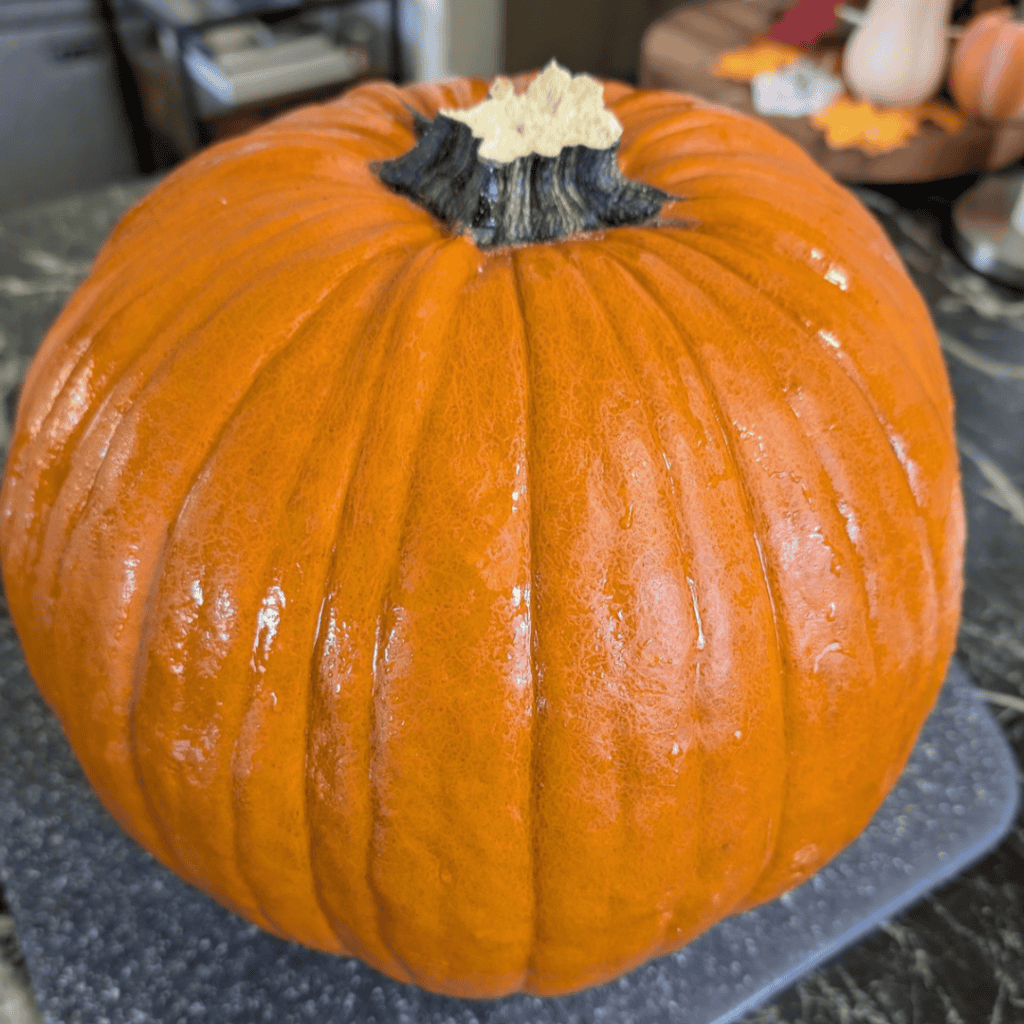
Step 1: Wash the Outside of the Pumpkin
Start by scrubbing the outside of the pumpkin with a clean vegetable brush under cool running water, then dry it thoroughly. Even though we aren’t eating the skin, the knife is going to pass through the outside of the pumpkin and into the flesh. Health Canada recommends using a vegetable scrub brush on firm-skinned produce such as squash.
Even though you aren’t going to eat the skin, you are going to cut through that exterior with your knife. Pumpkins can have dirt and other debris on the outside, particularly if they’re farm-grown or came straight from the garden.
Wash it first and dry the pumpkin well so you aren’t trying to control a large knife on a slippery surface.
Step 2: Cut the Pumpkin in Half
Set the pumpkin on a stable cutting surface.
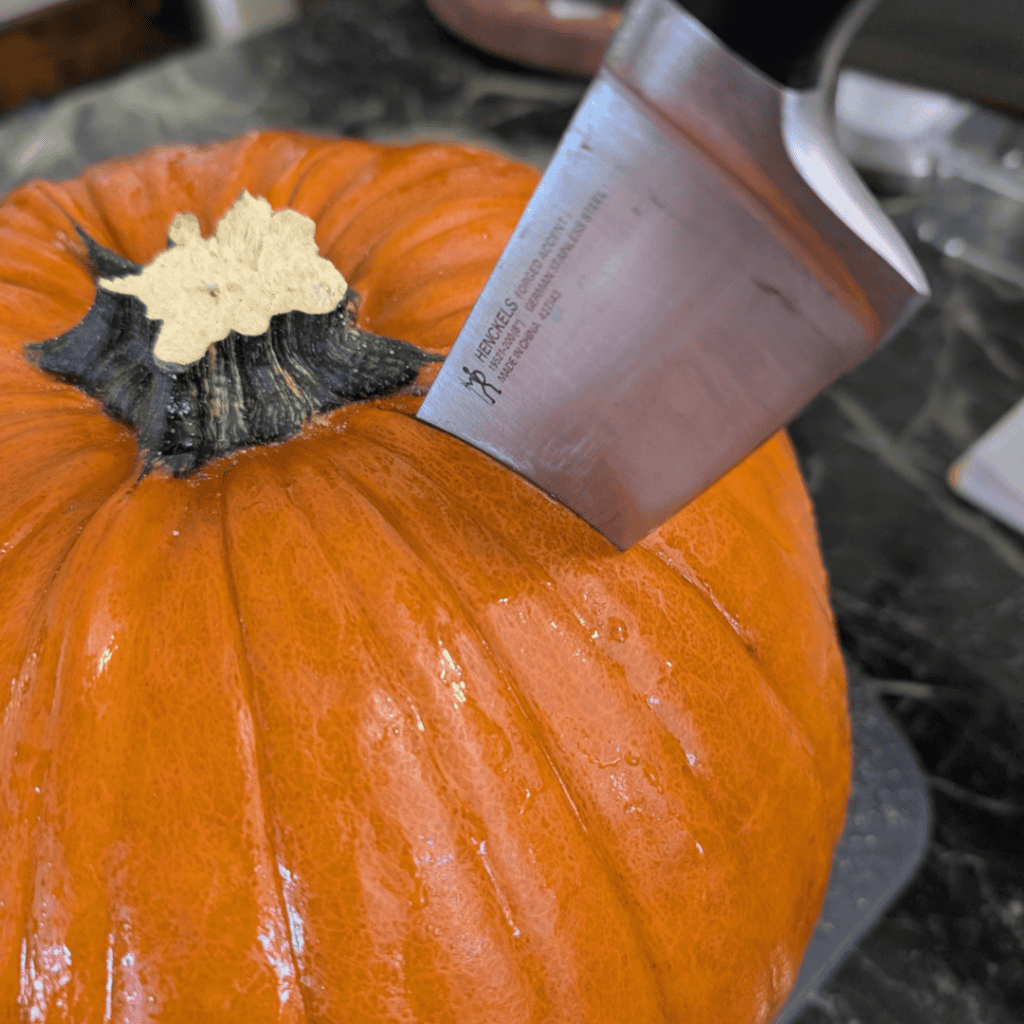
I use a very sharp butcher’s knife and start close to the stem. A regular pumpkin can have a very thick wall, so this isn’t necessarily something you’re going to slice cleanly through in one motion.
I work the knife gradually into the pumpkin, using controlled up-and-down movements to get through the hard outer rind and thick flesh.
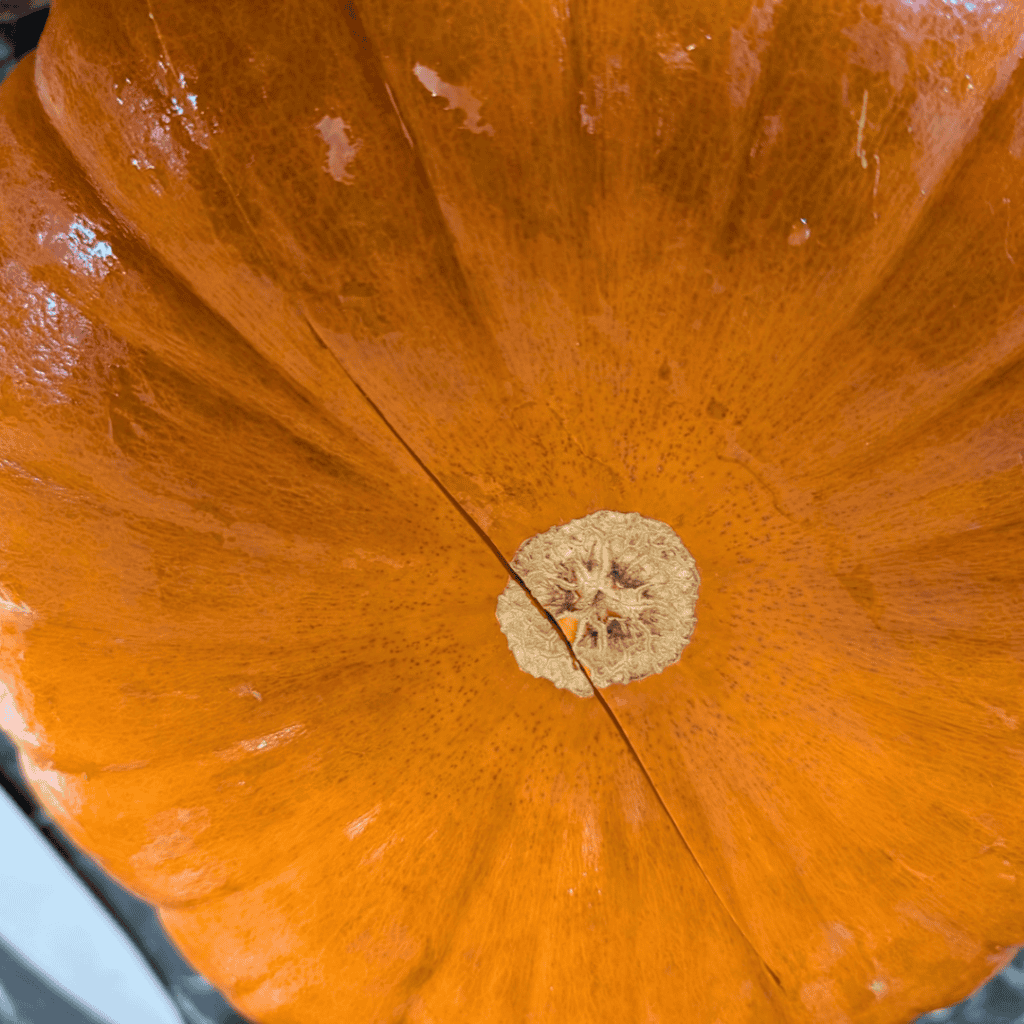
Continue working your way around the pumpkin from the stem toward the blossom end, around the bottom and back up the opposite side until you’ve cut all the way around it.
Once the cut meets back at the top, use your hands to pull the two halves apart.
Inside, you’ll see the hollow centre filled with pumpkin seeds and stringy pulp, just like you would with other winter squash.
A note about cutting large pumpkins
Don’t try to win a fight with the pumpkin.
If the knife becomes stuck, don’t start twisting it aggressively or putting your other hand in front of the blade.
Take your time, keep your hands clear of the cutting path and gradually work around the pumpkin.
A very large pumpkin is awkward simply because of its size.
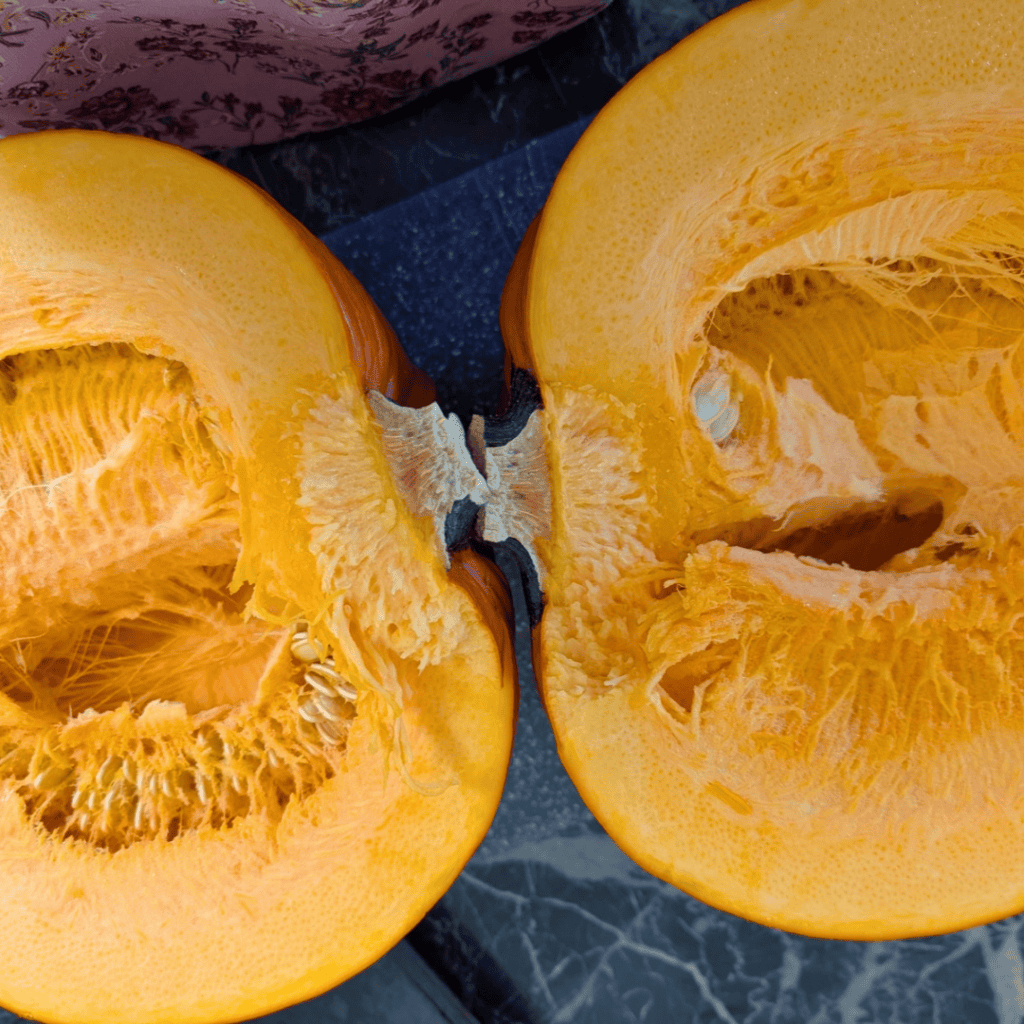
Step 3: Remove the Seeds and Most of the Pulp
I use a regular large tablespoon from my dinnerware drawer to clean out the inside.
Scoop out the seeds and as much loose stringy pulp as you reasonably can.
Don’t worry about getting the inside absolutely spotless.
If some of the strings are firmly attached to the flesh, leave them for now. They’re much easier to remove after the pumpkin has been roasted and softened.
Set the seeds aside instead of throwing them away so you can clean and roast them later for a snack.
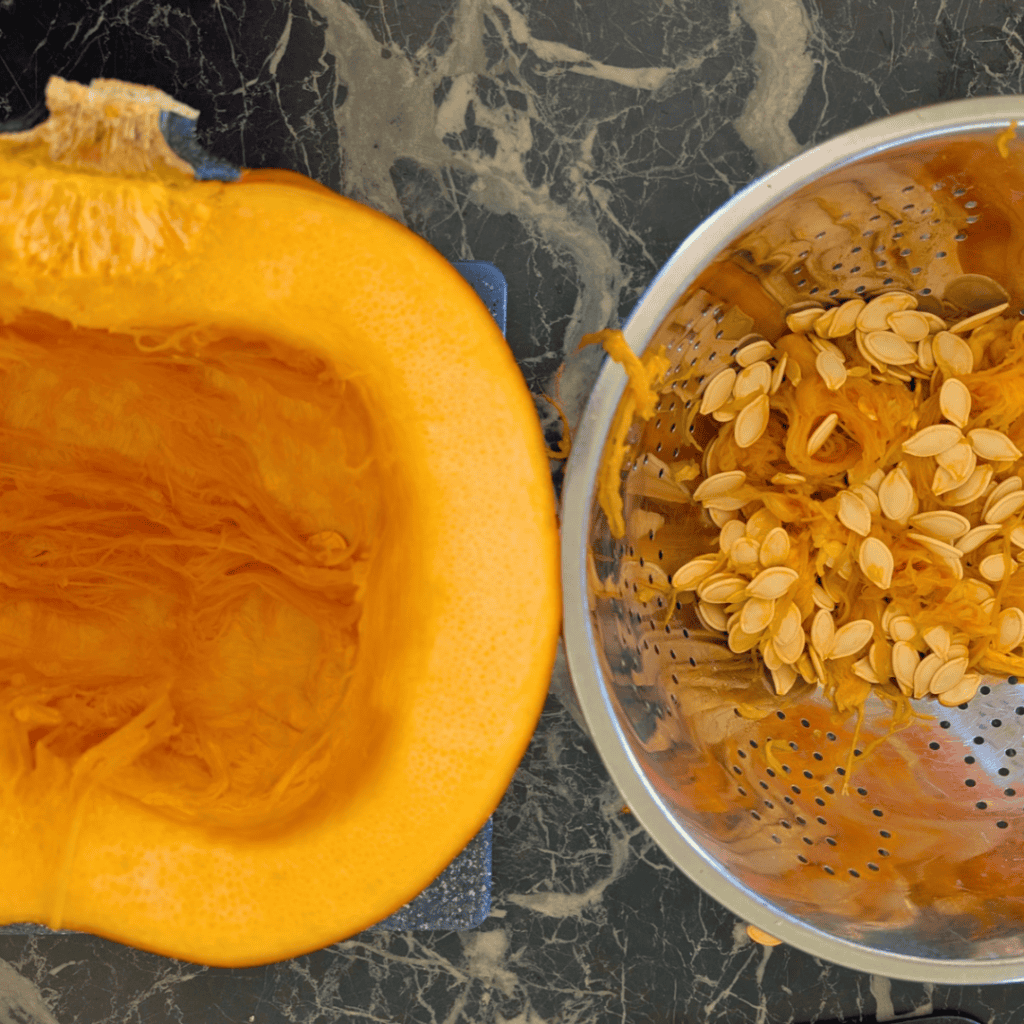
Step 4: Cut the Pumpkin Into Sections
A regular pumpkin is usually too large to put on a baking sheet in two halves.
I cut mine into quarters or fifths, giving me four to five large pieces.
If your pumpkin is even larger, you can cut it into additional sections. There isn’t a magic number of pieces here. Making sure the wedges of pumpkin are even is important for best cook.
You just want to be sure the pumpkin fits comfortably on your baking sheet without the pieces being stacked on top of one another.
Step 5: Prepare the Baking Sheet
You can put the pumpkin directly on a large baking sheet, which is what I did, but I recommend using parchment paper if you have some on hand.
As pumpkin roasts, juices can leak out onto the pan.
Those juices can become sticky and almost harden onto the baking sheet as they cool. Parchment doesn’t change how the pumpkin cooks, but it can make cleanup considerably easier afterward.
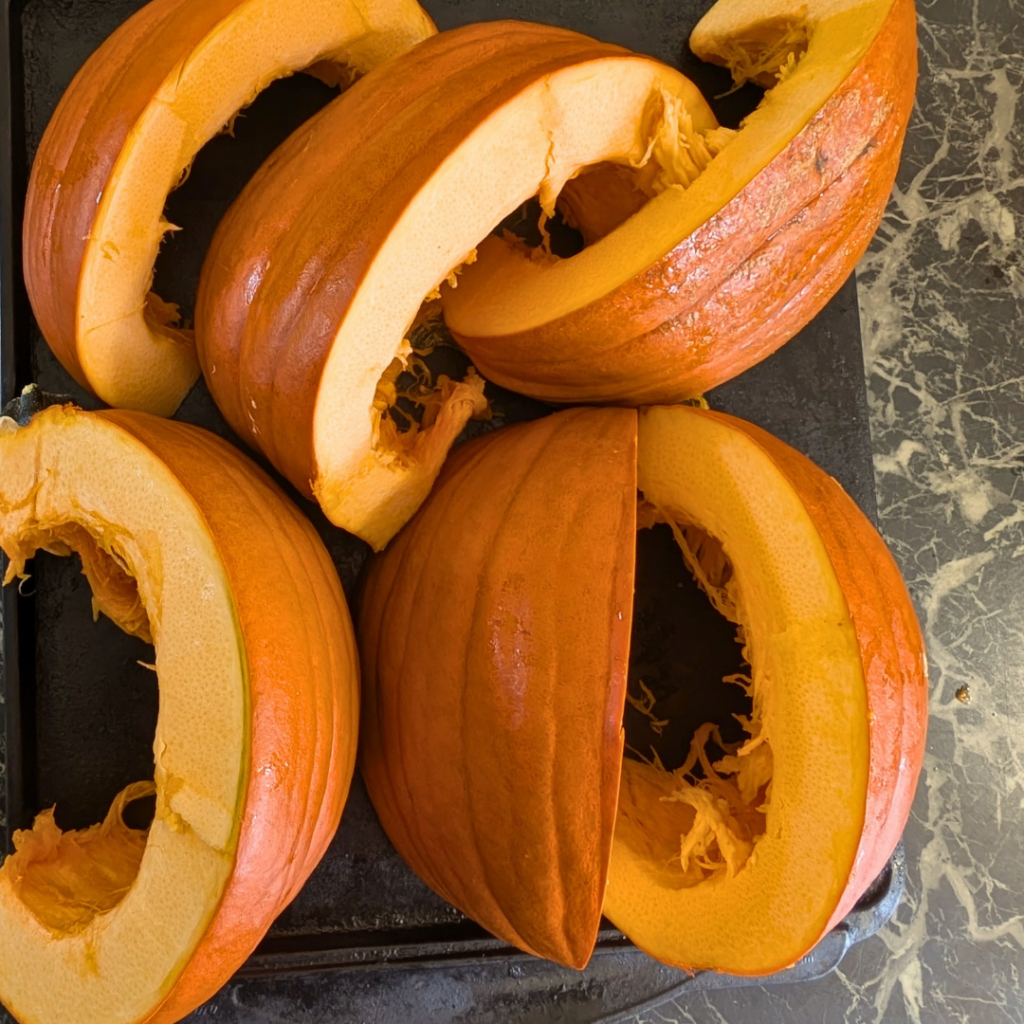
Step 6: Add a Pan of Water to the Oven
I also place a 9×13-inch oven-safe dish containing water on a lower oven rack while the pumpkin cooks.
The water creates additional steam and moisture inside the oven while those thick pumpkin sections roast.
Put the water in the dish before placing it in the oven rather than pouring cool water into a hot glass dish.
Step 7: Roast the Pumpkin
Preheat your oven to 350°F.
Arrange the pumpkin pieces on the prepared baking sheet and place them in the oven.
Roast for approximately 40 to 45 minutes, then begin checking the pumpkin.
This timing isn’t absolute.
A large field pumpkin can be considerably thicker than a pie pumpkin, and different pumpkins can take different amounts of time to soften.
The pumpkin itself will tell you when it’s done.
How Do You Know When Roasted Pumpkin Is Done?
Use a regular dinner fork.
Push the fork through the outer skin and into the pumpkin flesh.
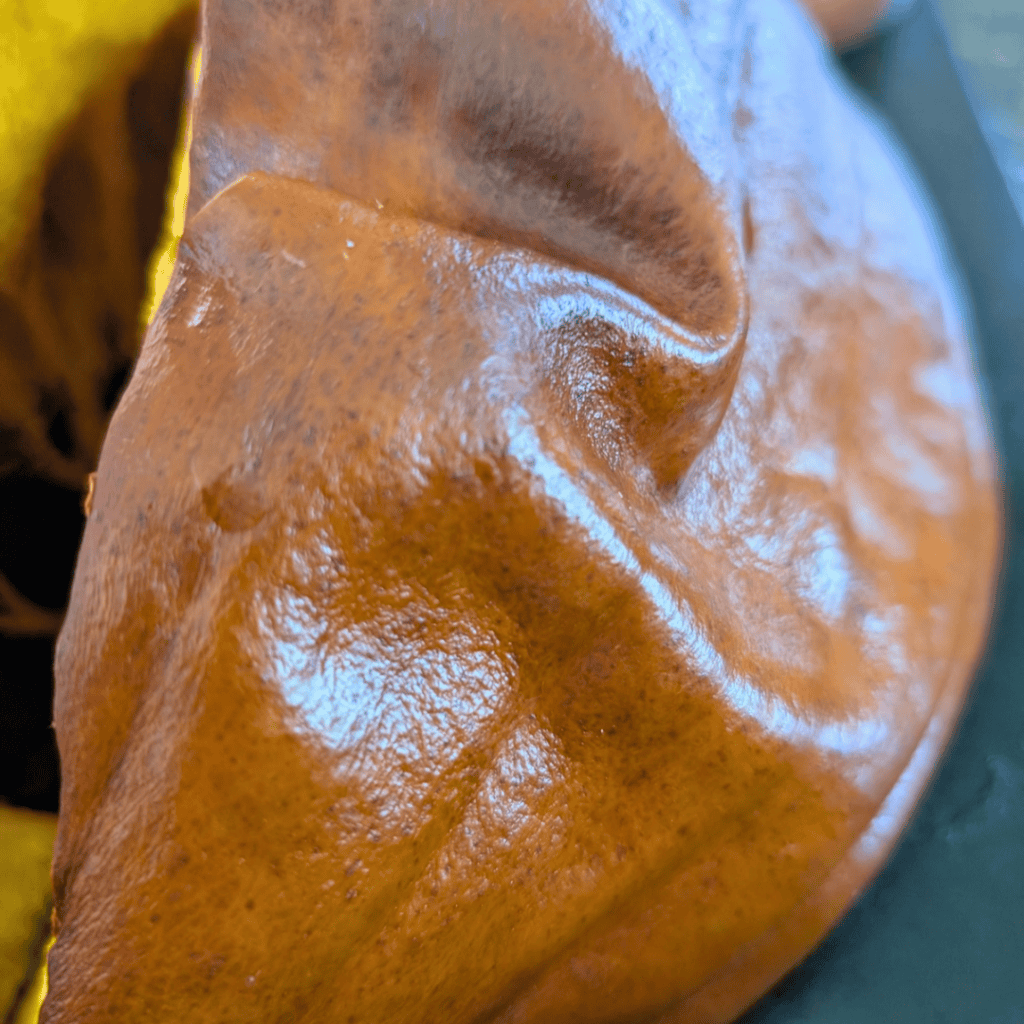
As the pumpkin cooks, you’ll notice the skin beginning to wrinkle and brown. Certain areas can also puff up slightly as it roasts.
Those are useful visual signs, but I don’t depend on them.
The real test is the fork.
Your pumpkin is cooked when you can push that fork easily through the skin and into the flesh.
If you have to force the fork through, put the pumpkin back in the oven and give it more time.
For a large pumpkin, fork tender matters more than the clock.
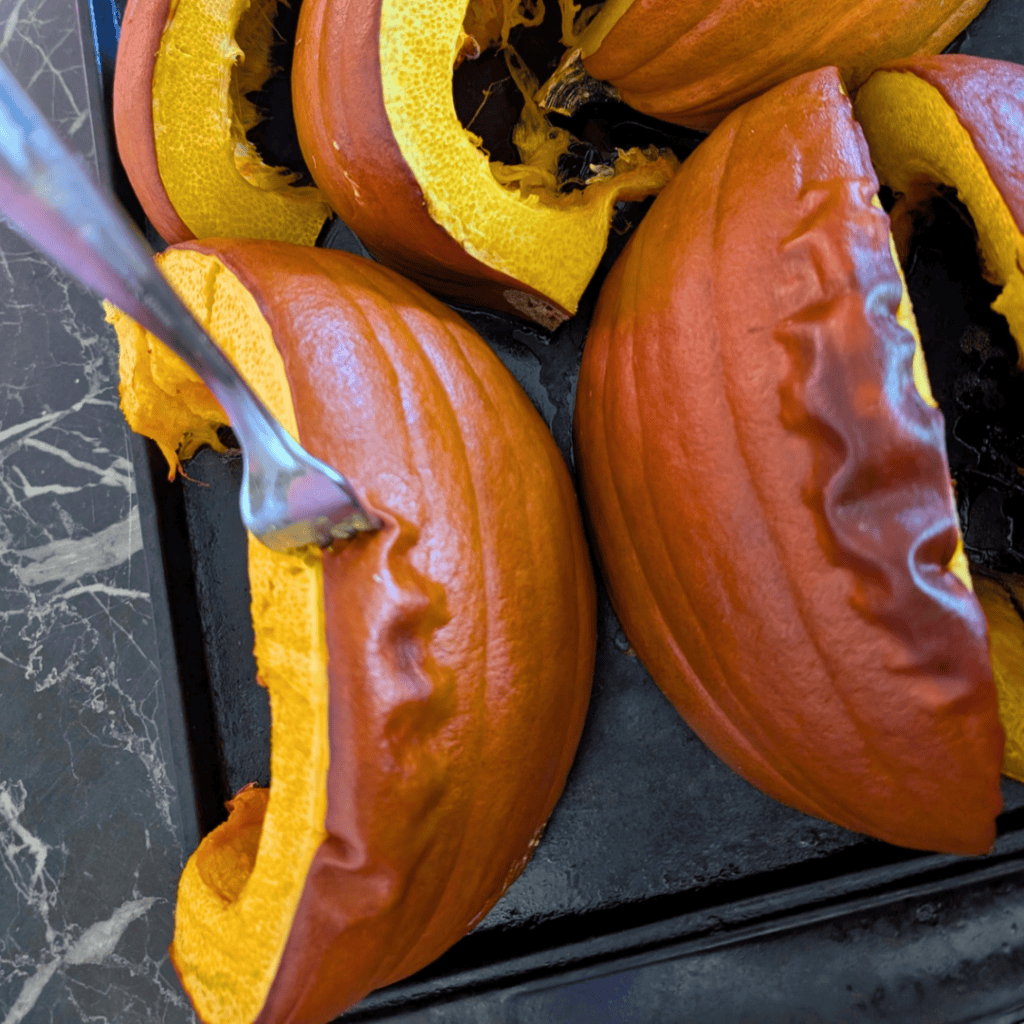
Step 8: Let the Pumpkin Cool
Once the pieces are completely tender, remove the baking sheet from the oven.
Then leave them alone until they’re cool enough to handle safely.
Hot pumpkin really is too hot to handle.
Those thick pieces hold a lot of heat, and trying to peel them immediately doesn’t save enough time to make burned fingers worthwhile.
Cooling the pumpkin also makes the next step much easier.
Step 9: Remove the Pumpkin Skin
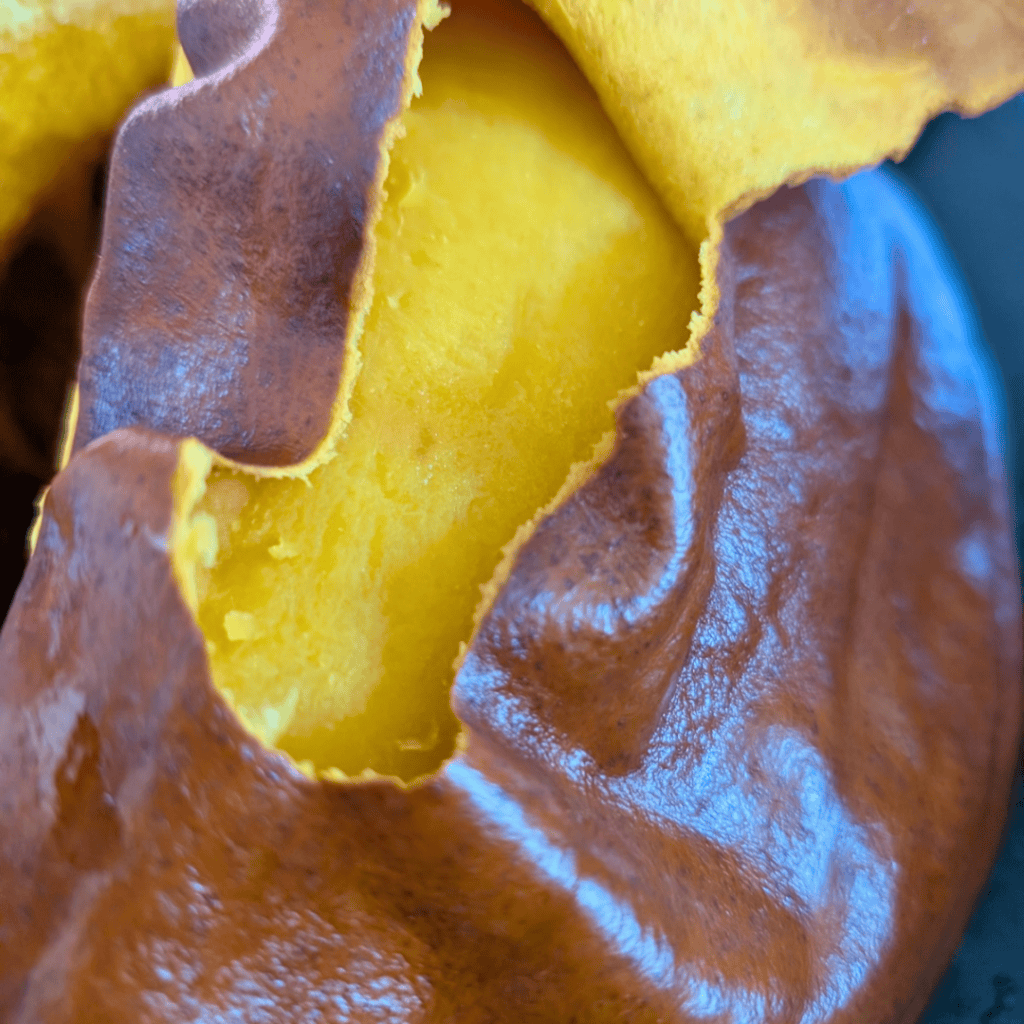
Once the roasted pumpkin is cool enough to handle, use a small paring knife to lift and work the skin away from the flesh.
After roasting, the skin becomes quite thin and should pull away much more easily than it would from a raw pumpkin.
This is one of the reasons I much prefer roasting first instead of trying to peel a large raw pumpkin.
You can also use the edge of your paring knife to gently drag along the surface of the pumpkin and remove any stringy pulp you couldn’t get off earlier.
At this point, you should be left with soft cooked pumpkin flesh.
Step 10: Cut the Flesh Into Chunks
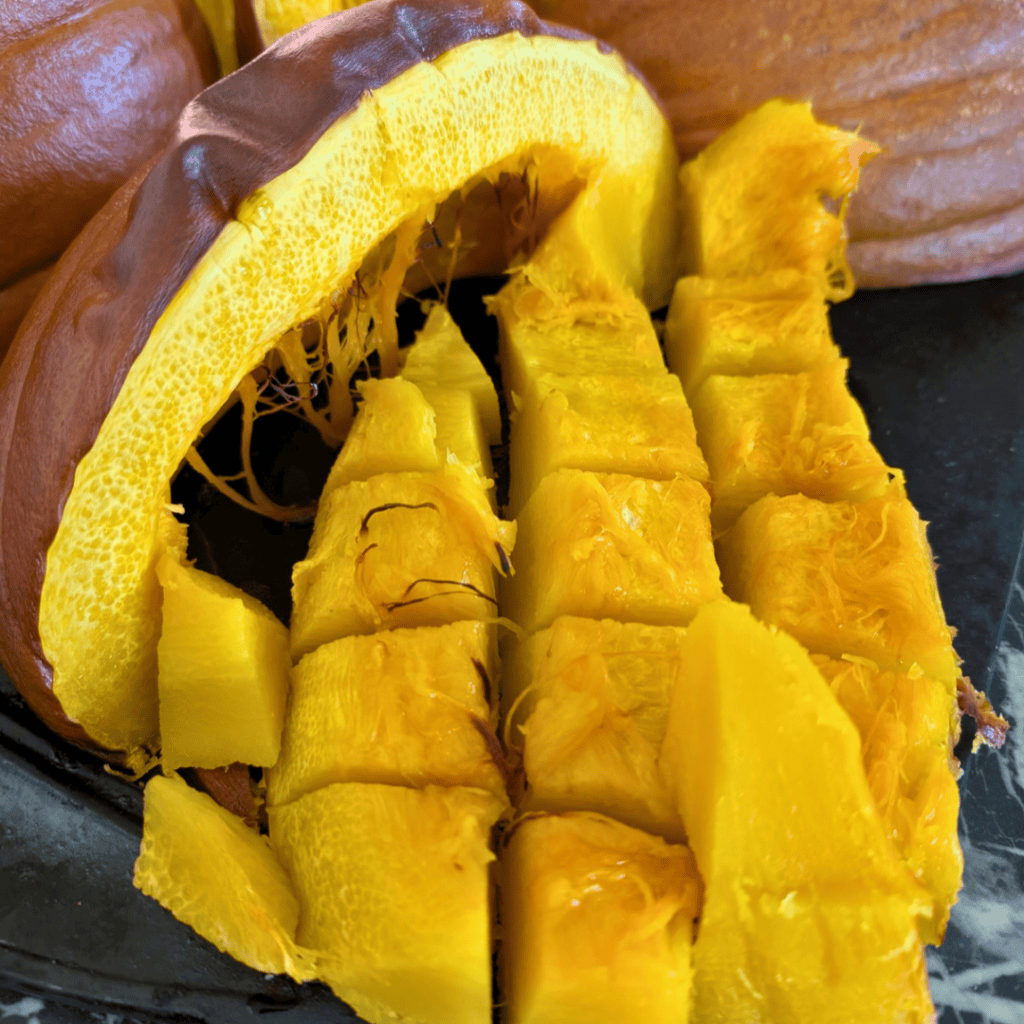
Cut the cooked pumpkin into pieces that will fit comfortably into your food processor.
Don’t try to puree the entire pumpkin in one batch.
There’s simply too much flesh in a regular pumpkin, and overfilling your machine makes it harder for the blades to move the pumpkin around evenly.
I usually put about four or five pieces into my Ninja at a time.
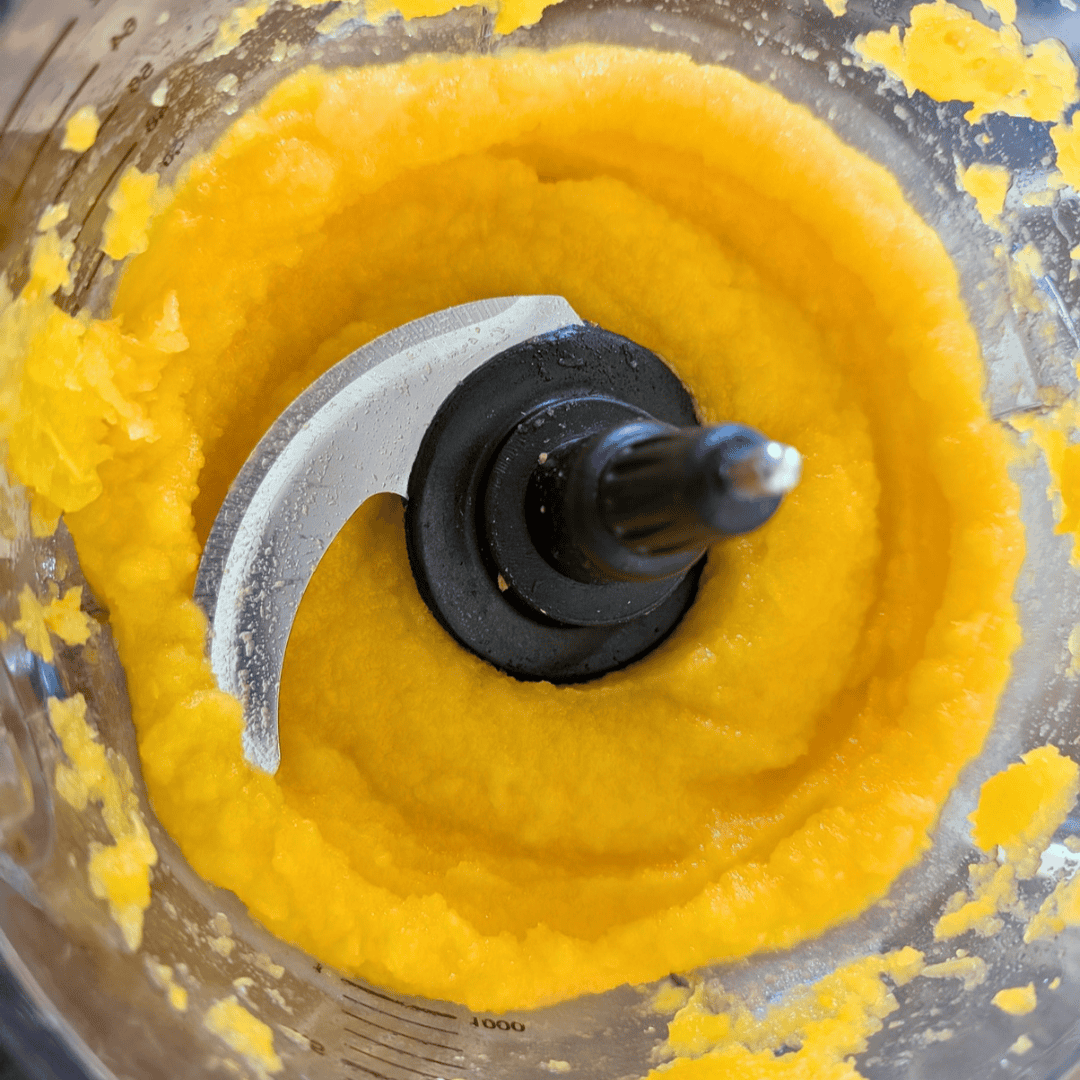
Step 11: Puree Until Completely Smooth
With my Ninja, I start the food processor on high and let it run for a good couple of minutes.
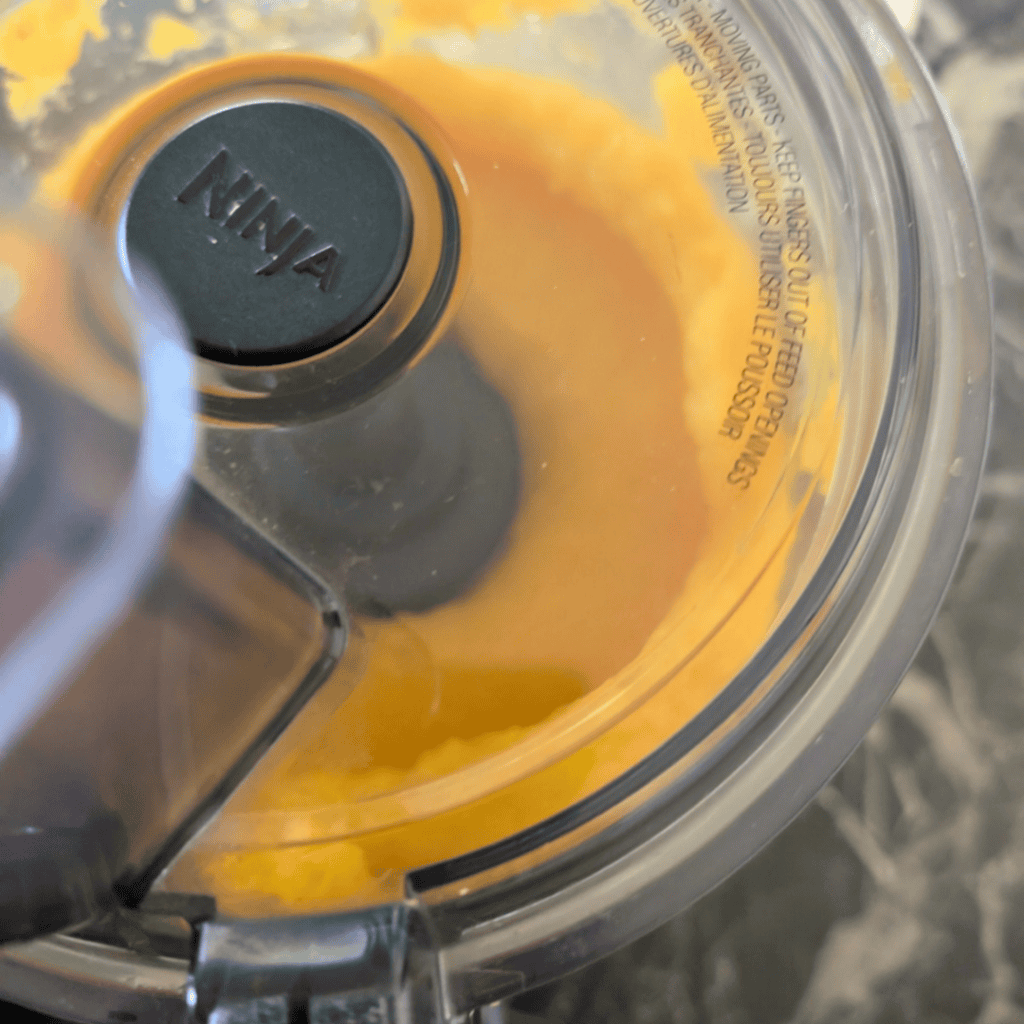
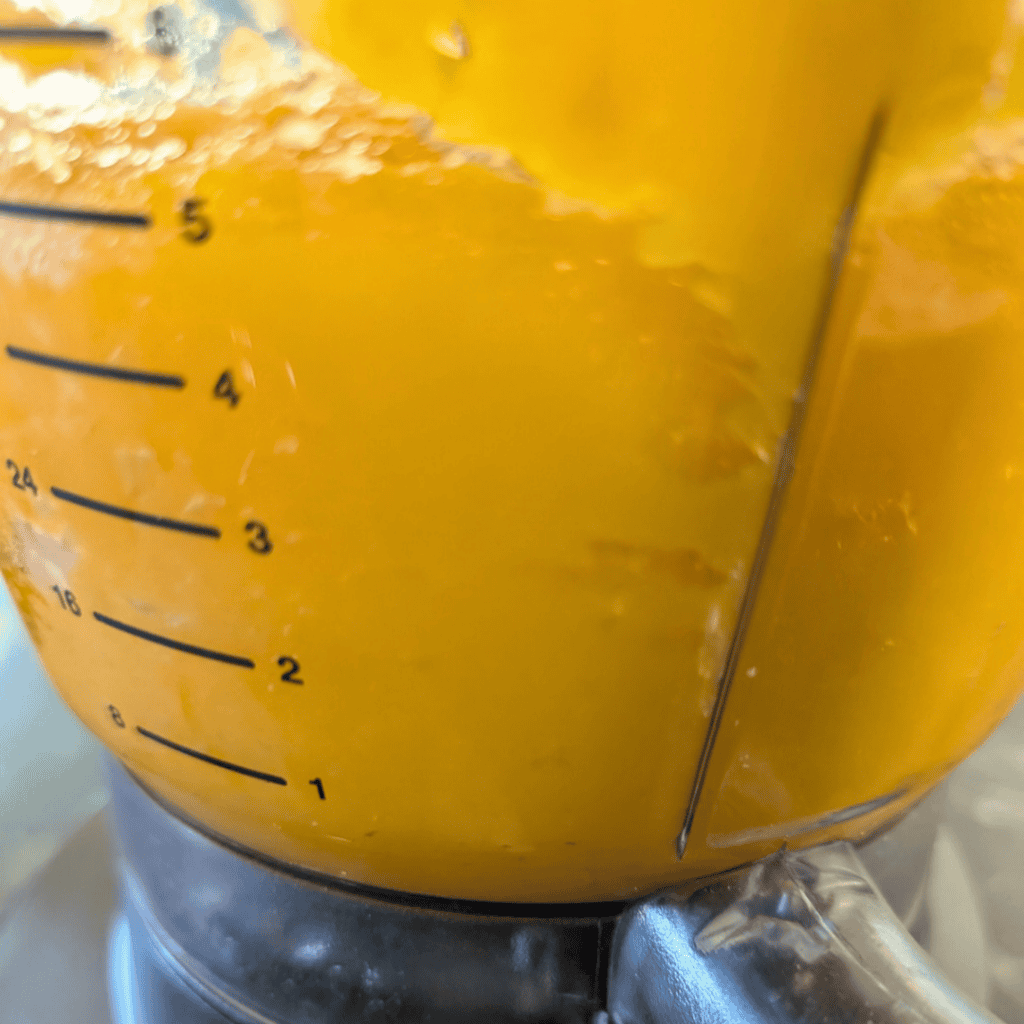
As it processes, look through the side of the container. Sometimes pieces of pumpkin get pushed right up against the wall of the processor, and you can usually see whether any larger chunks are still hanging on there without stopping the machine and taking the lid off.
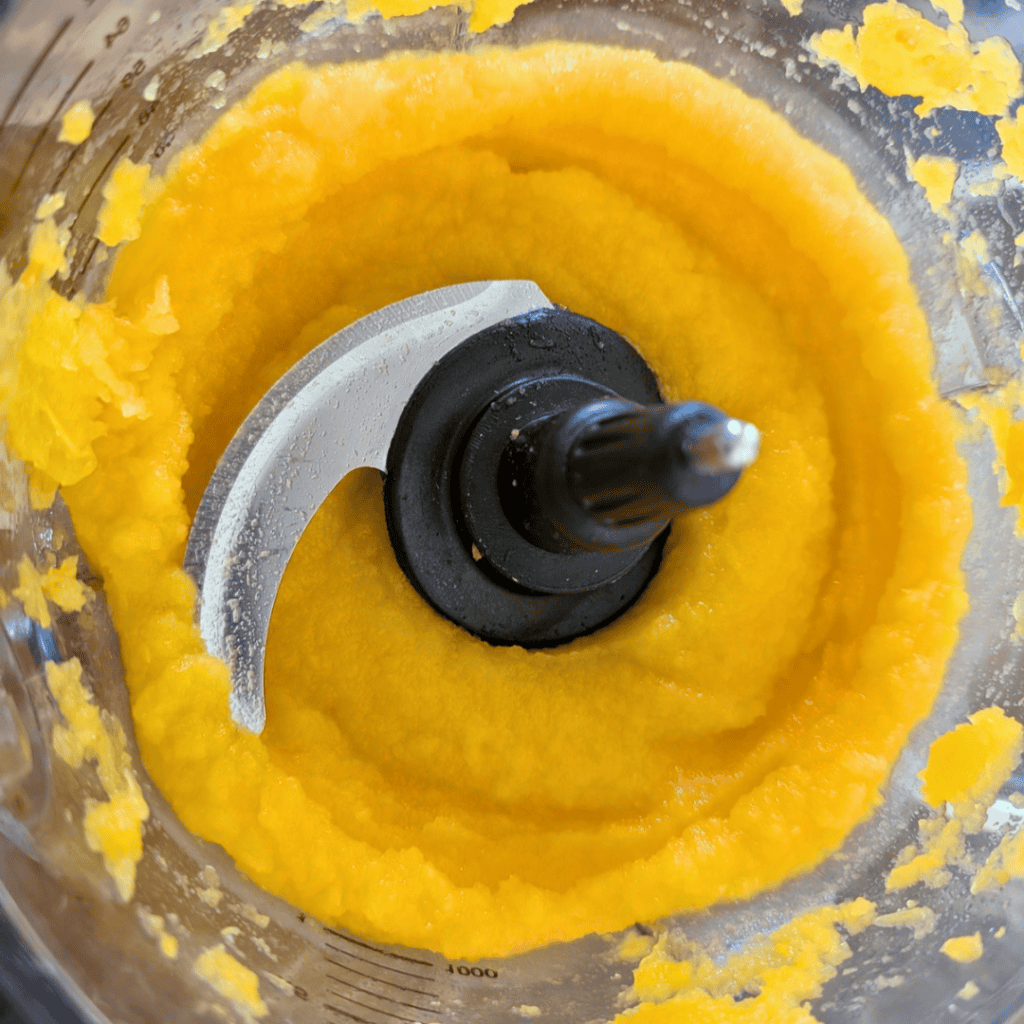
Once you no longer see any obvious chunks, continue processing until the pumpkin is completely smooth and has a baby-food-like consistency.
Take a quick look at the consistency before transferring the batch. If liquid is pooling around the puree or it is noticeably thinner than canned pumpkin, you may want to drain some of the excess moisture before using it for baking. Transfer each finished batch to a large clean bowl and continue processing the remaining pumpkin.
When all the pumpkin has been pureed, stir everything together. That helps even out the moisture because one section of a large pumpkin can sometimes be a little wetter or drier than another.
That feels much more like your real process and gives the reader a useful visual cue while they’re actually doing it.
Do You Need to Add Water to Homemade Pumpkin Puree?
Usually, no.
Don’t automatically add water just because the puree looks thick when you first start the food processor.
Give the machine time to break down the pumpkin first.
A strong food processor such as my Ninja handles roasted pumpkin quite easily.
If you’re using a less powerful blender or food processor, you may need to stop, scrape the sides and experiment a little with your machine’s settings.
Occasionally you’ll get a genuinely dry pumpkin.
This can also happen if you use this same roasting method for something like a Hubbard squash.
In that case, start by adding about ⅛ cup of water.
Process the pumpkin again and see whether that gives the blades enough movement.
Only add more water if you need it.
Even ¼ cup can be plenty for a dry batch.
It’s much easier to add another splash of water than it is to fix puree you’ve accidentally made too thin.
What if My Homemade Pumpkin Puree Is Watery?
This is probably the biggest difference you’ll notice when making puree from a regular pumpkin rather than a pie pumpkin.
Large pumpkins can naturally contain more water.
That’s not automatically a problem.
If you’re making soup, a stew, sauce or another recipe where a little additional moisture won’t hurt anything, you may be able to use it exactly as it is.
Baking is different.
Canned pumpkin puree is quite thick, and many pumpkin cakes, muffins, cookies and breads have been developed around that consistency.
If your homemade pumpkin puree looks much thinner than canned pumpkin, place it in a fine-mesh sieve over a bowl and allow some of that excess liquid to drain away.
You aren’t trying to dry the pumpkin out.
You simply want the consistency to be closer to the thick puree your baking recipe expects.
Is Pure Pumpkin the Same as Pumpkin Puree?
When a can is labelled 100% pure pumpkin, it generally means plain cooked pumpkin or squash puree without pumpkin pie spices, sugar or other ingredients added.
Homemade pumpkin puree serves the same basic purpose, but its moisture level can vary more because you’re working with an actual fresh pumpkin rather than a standardized commercial product.
That’s why I pay attention to consistency before swapping homemade puree into a baking recipe.
Also don’t confuse plain pumpkin puree with pumpkin pie filling.
Pumpkin pie filling contains additional ingredients and seasoning. Plain puree is simply cooked pumpkin.
That distinction is especially useful because once you’ve made this unseasoned puree, you can later turn it into my pumpkin pie filling made with pumpkin puree or use it in completely different sweet and savory recipes.
How to Freeze Homemade Pumpkin Puree
I didn’t have time to bake with all of my pumpkin the day I made it, so I froze mine.
That is one of the easiest parts of the whole process.
Once the puree has cooled, measure it into the portion sizes you are most likely to use.
I use two-cup portions because that is a useful amount for many of the pumpkin recipes I make.
Spoon two cups into a freezer bag, press out as much excess air as you reasonably can, seal it and label the bag with both the amount and the date.
Then lay the bags flat in the freezer.
Flat bags take up much less room and are easier to stack once frozen.
I aim to use my homemade pumpkin puree within about six months for best quality.
When you’re ready to bake with it, thaw the bag in the refrigerator. Be sure to sit it on a plate or in a bowl so as to not make a big wet mess on the fridge shelf.
Homemade puree can release a little water after freezing and thawing. Stir it well before measuring, and if you’re using it for baking and it seems noticeably watery, drain off that excess moisture first. If you don’t have a sieve on hand you can also remove the liquid by cooking the pumpkin in a saucepan. Be sure to stir it as it comes to a boil to allow moisture to rise to surface and to keep it from sticking to the bottom of the pan.
Can Pumpkin Puree Be Canned Instead?
This is one place where I would not substitute canning for freezing.
Home food-preservation guidance does not recommend canning mashed or pureed pumpkin because the thickness can vary too much for a single safe processing method.
If you want puree, freeze it.
Tested home-canning instructions for pumpkin use pumpkin cut into cubes rather than mashed or pureed pumpkin. The National Center for Home Food Preservation specifically advises against home canning mashed or pureed pumpkin because batches can vary too much in thickness for a single safe processing recommendation. Tested canning instructions are for pumpkin cut into 1-inch cubes instead.
How Long Does Homemade Pumpkin Puree Last in the Fridge?
If you aren’t freezing your puree immediately, cool it promptly and keep it refrigerated in a clean covered container.
For cooked leftovers, Health Canada recommends using refrigerated leftovers within a few days. For my homemade pumpkin puree, I wouldn’t make a large batch and plan on leaving it in the refrigerator all week.
If I’m not using it within the next couple of days, I portion it and freeze it.
That way I don’t have to remember exactly when I made it, and I don’t risk losing a batch I went through all that work to prepare.
What Can You Make With Homemade Pumpkin Puree?
This is where making a whole pumpkin becomes worthwhile.
Keep your puree plain and you can decide what to turn each package into when you pull it out of the freezer.
Some of the recipes and ideas I use—or want to add to this pumpkin series—include:
- Pumpkin muffins, including pumpkin cream cheese muffins
- Pumpkin loaf and pumpkin bread
- Pumpkin banana bread
- Pumpkin pancakes
- Pumpkin scones
- Pumpkin cookies and pumpkin chocolate chip cookies
- Pumpkin muffins
- Pumpkin brownies
- Pumpkin cakes and Bundt cakes
- Pumpkin pie and pumpkin pie filling
- Pumpkin butter
- Pumpkin oatmeal
- Pumpkin soups and savory sauces
- Pumpkin spice lattes
- Homemade pumpkin syrup for coffee
- Homemade pumpkin coffee creamer
- Pumpkin cream cold foam
That range is why I don’t season the puree before storing it.
Two cups can become something completely different depending on what we need that week.
The goal is to be able to start with one regular fall pumpkin and actually use it—from the seeds right through to the frozen puree.
Expert Tips for Making Pumpkin Puree From Fresh Pumpkin
Expert Tip #1: Don’t obsess over the roasting time. Forty to 45 minutes gives you a good point to start checking, but a thick pumpkin may take longer. If the fork isn’t going through easily, it isn’t finished.
Expert Tip #2: Roast before peeling. Trying to remove the rind from a huge raw pumpkin creates unnecessary work. The skin is much easier to remove after cooking.
Expert Tip #3: Don’t fight with every string while the pumpkin is raw. Remove the loose pulp and come back for the stubborn fibers after roasting.
Expert Tip #4: Don’t automatically add water while blending. Most roasted pumpkins contain enough moisture already.
Expert Tip #5: Process in batches. Your food processor will give you a smoother puree if you don’t overcrowd the bowl.
Expert Tip #6: Compare the texture to canned pumpkin before baking. If your homemade puree is significantly wetter, let some of that extra moisture drain away.
Expert Tip #7: Freeze useful quantities. I like two cups, but if you frequently make recipes that use one cup or ½ cup, there’s nothing wrong with freezing some smaller portions too.
FAQ
Don’t Throw Away the Seeds
Before you compost that pile you scraped out of the pumpkin, separate out the seeds.
They are the next part of this pumpkin series.
Fresh pumpkin seeds can be cleaned, dried, seasoned and roasted for a snack, which means we’re getting another use from something that otherwise would have gone directly into the compost.
From One Fall Pumpkin to Several Recipes
For me, this is less about making a trendy homemade ingredient and more about using what I have.
That’s something I grew up with.
When you grow food yourself—especially when you grew up off-grid and knew a garden didn’t guarantee you a perfect crop every year—you tend to look at a good pumpkin differently.
I see the seeds I can roast.
I see pumpkin puree I can put in the freezer.
I see muffins, cake, pancakes, soup and bread that haven’t been made yet.
And if that pumpkin has already been sitting in my kitchen as part of fall, I’d much rather turn it into food than carry the whole thing out to the compost pile.
So if you have a regular pumpkin that is still whole and firm, don’t worry because it isn’t a pie pumpkin.
Roast it.
Puree it.
Freeze what you aren’t going to use right away.
Then we’ll work our way through the rest of that pumpkin together.
How to Make Pumpkin Puree From a Regular Pumpkin
Equipment
- Butchers Knife
- Large Baking Tray
- parchment paper Optional
- Food Processor
- Paring Knife
- Fork
Materials
- 1 Pumpkin
Instructions
- Preheat the oven to 350°F.
- Wash the outside of the pumpkin under cool running water and dry it thoroughly.
- Place the pumpkin on a sturdy cutting surface. Using a large, very sharp knife, begin cutting near the stem and gradually work the knife through the rind and thick pumpkin flesh.
- Continue cutting around the pumpkin from the stem, down toward the blossom end, around the bottom and back up the opposite side until you have cut all the way around.
- Pull the pumpkin halves apart.
- Use a large tablespoon to scoop out the seeds and loose stringy pulp. Set the seeds aside so you can clean and roast them later for a snack. Do not worry if a few strings remain attached because they are easier to remove after roasting.
- Cut each pumpkin half into smaller sections that will fit comfortably on your baking sheet. I usually cut mine into quarters, but a very large pumpkin may need to be divided into more pieces.
- Line a large baking sheet with parchment paper for easier cleanup and arrange the pumpkin pieces on the pan without stacking them.
- Fill an oven-safe 9×13-inch baking dish with water and place it on a lower oven rack to add moisture while the pumpkin roasts.
- Roast the pumpkin for 40 to 45 minutes, then begin checking for doneness.
- Test with a regular dinner fork. The skin should look browned and wrinkled, and the fork should pass easily through both the skin and pumpkin flesh. If the pumpkin is still firm, continue roasting until completely tender.
- Remove the pumpkin from the oven and let it cool until the pieces are comfortable to handle.
- Use a small paring knife to lift and remove the roasted pumpkin skin. Gently scrape away any remaining stringy pulp.
- Cut the peeled pumpkin flesh into chunks that will fit easily into your food processor or blender.
- Working in batches, add about four or five pieces of pumpkin at a time. Process on high for a couple of minutes, then continue processing until completely smooth and baby-food-like in texture.
- Transfer each finished batch to a large bowl and repeat with the remaining pumpkin.
- Stir all of the finished puree together so the moisture is evenly distributed.
- Use immediately, or allow the puree to cool completely before freezing.
- To freeze, measure the puree into 2-cup portions and spoon it into freezer bags. Press out excess air, seal, label with the amount and date, and freeze flat.
- Thaw frozen pumpkin puree in the refrigerator before using. Stir well after thawing.


