How to Roast Pumpkin Seeds in the Oven
If you are already cutting open a pumpkin for roasting, soup, baking, or homemade pumpkin puree, there is no reason to throw away the seeds. Once the pumpkin is open, you can separate the seeds from the stringy pulp, wash them, dry them well, and roast them right alongside the rest of your pumpkin prep.
This how to roast pumpkin seeds method uses fresh pumpkin seeds, olive oil, and salt, then slow roasts them at 325°F until they are dry and lightly toasted.
The part that takes the most patience is cleaning the pumpkin seeds. The pulp does not simply rinse away in the colander, so you will need to work through the seeds a few at a time. Once they are cleaned and dried, the actual roasting is quite simple.
You can keep the whole batch salted or divide a large baking sheet into sections and season different parts of the batch differently.
Quick Answer
To roast fresh pumpkin seeds, clean away all of the pumpkin pulp, dry the seeds thoroughly, toss them with olive oil and salt, and spread them in a single layer on a baking sheet. Roast pumpkin seeds at 325°F on the center oven rack for 15 to 20 minutes, stirring once halfway through, until they are dry and lightly toasted.
Method:
Oven roasted
Oven Temperature:
325°F
Cook Time:
15–20 minutes
Best For:
Fresh seeds removed from a pumpkin
Make Ahead:
Cleaned seeds can be refrigerated for up to 2 days before roasting
Finish:
Dry with a lightly toasted appearance, not dark brown or black
Using Fresh Pumpkin Seeds
I make these when I am already cutting open a fresh pumpkin. Once the pumpkin is opened and the seeds and pulp have been removed, I set the seeds aside instead of throwing them away.
One thing I have found is that cleaning the seeds takes a little more hands-on work than you might expect. Running water over a colander will not remove all of the pumpkin pulp by itself. It is easier to lift small amounts at a time and pull the seeds away from the pulp with your fingers.
The roasting itself is much less work once that part is finished.
Why You’ll Love These Roasted Pumpkin Seeds
Uses What You Already Have: The seeds are saved while you are preparing a fresh pumpkin rather than being discarded.
Simple Oven Method: The seeds roast slowly at 325°F without requiring any special equipment.
Flexible Seasoning: Keep the batch salted or divide the baking sheet into different flavours.
Can Be Prepared Ahead: Cleaned and dried pumpkin seeds can be refrigerated for up to two days before you roast them.
Budget Tip:
If you are already buying a pumpkin for roasting, baking, soup, or puree, saving the seeds gives you another use from the same pumpkin.
The only additional ingredients needed for the basic version are olive oil and salt, both of which are pantry ingredients in many kitchens.
How to Clean Pumpkin Seeds Before Roasting
After cutting open your pumpkin, scoop out the seeds along with the stringy pumpkin pulp.
Place everything into a colander and bring it to the sink. Run cool to slightly cool water over the seeds while you begin separating the seeds from the pulp.
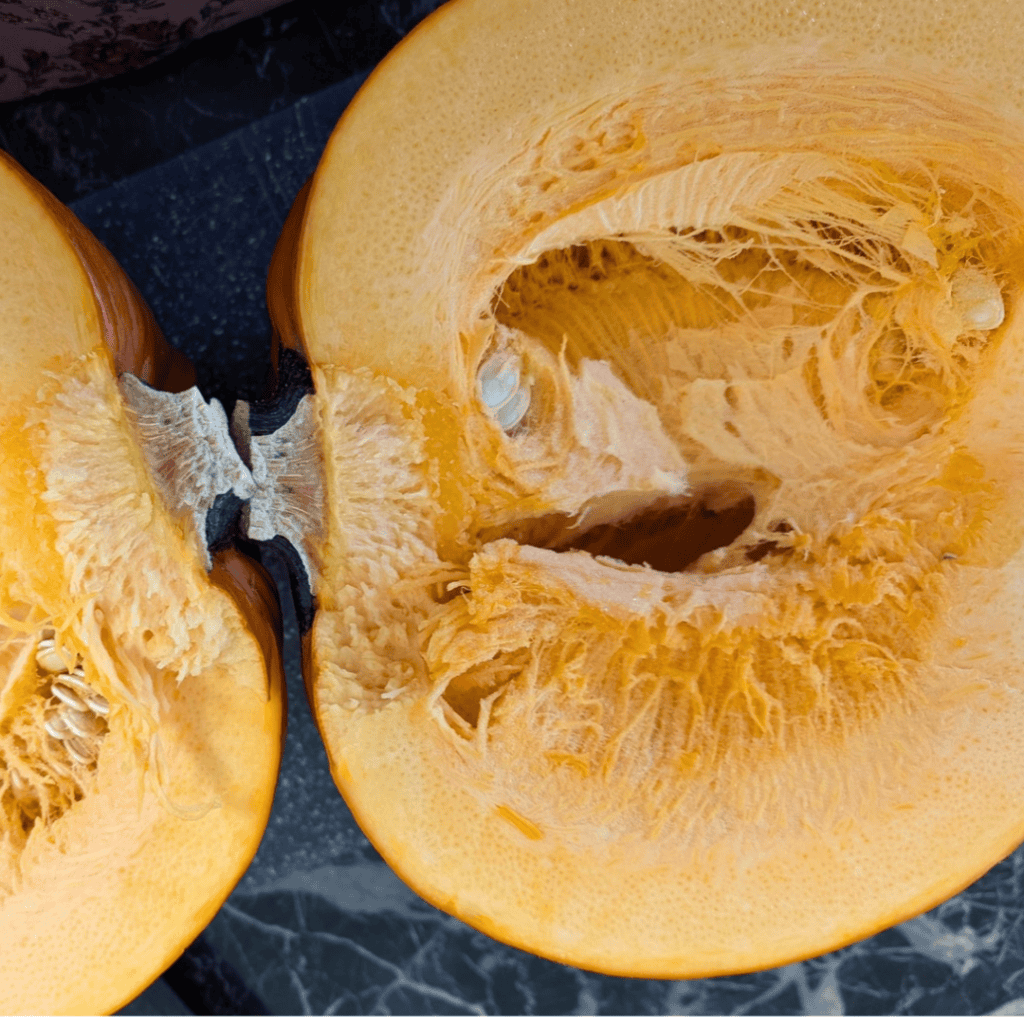
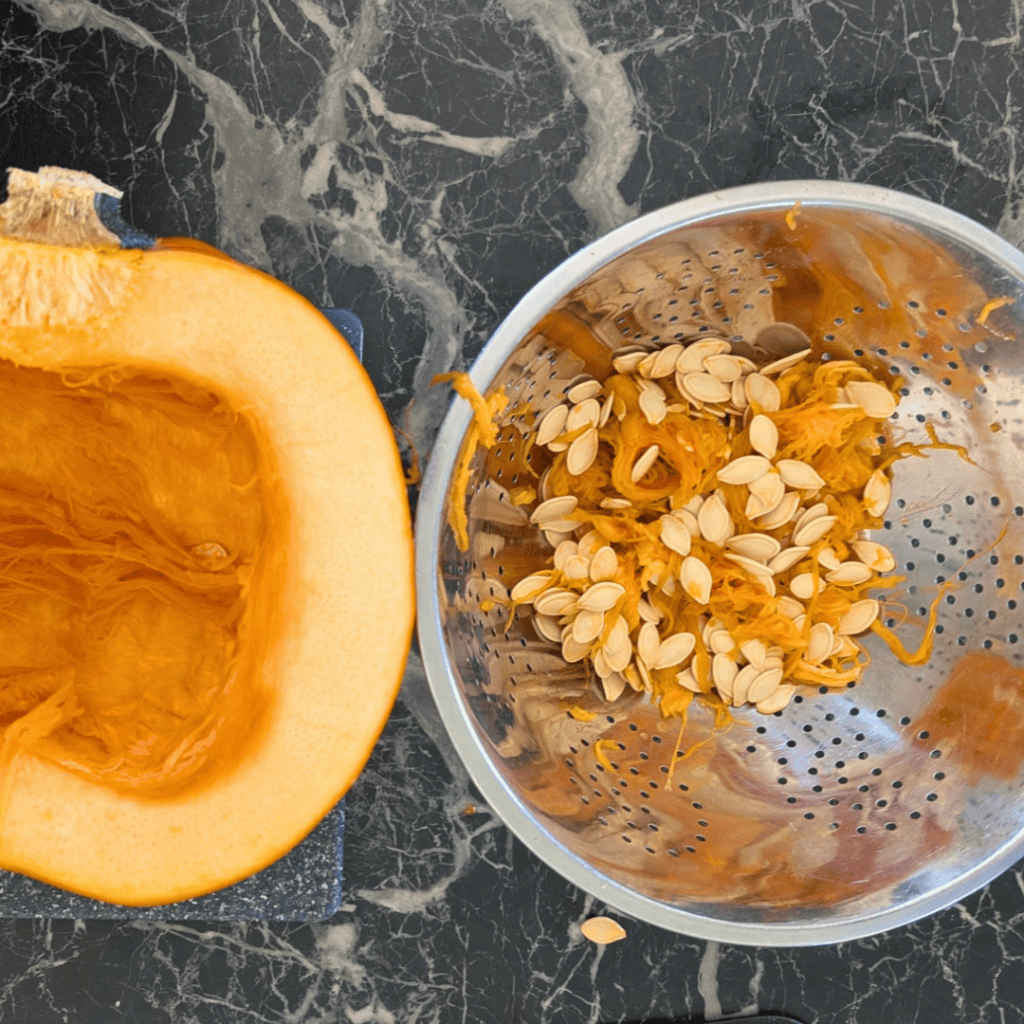
The pumpkin pulp will not simply fall away on its own. Pick up small sections at a time and use your fingers to pull the seeds free from the stringy pieces.
As the seeds are cleaned, you can drop them back into the colander or transfer them to a clean bowl. I find it easier to put the cleaned seeds into a second bowl so I can tell which ones I have already worked through.
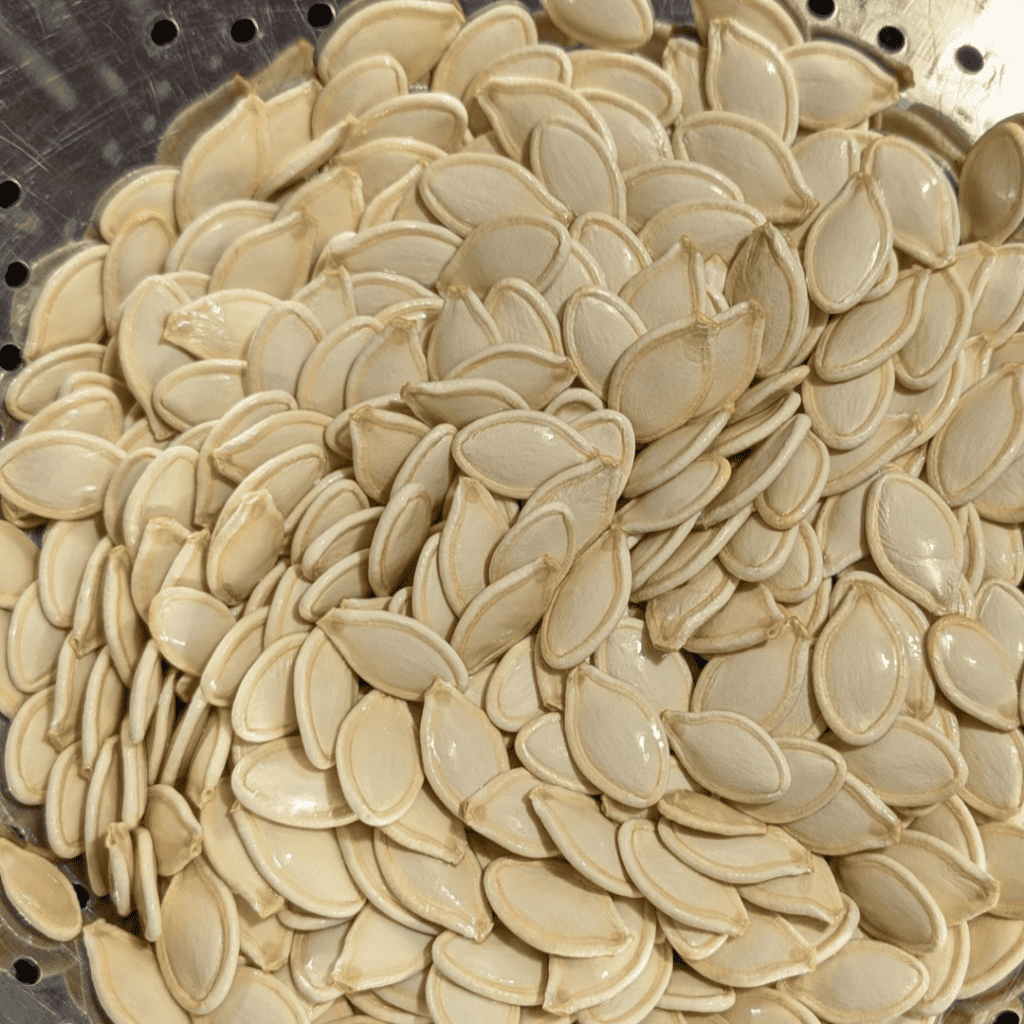
Continue until all of the visible pumpkin pulp has been removed and the seeds are thoroughly rinsed.
Dry the Pumpkin Seeds Well
Drying the seeds is important before adding oil and roasting them.
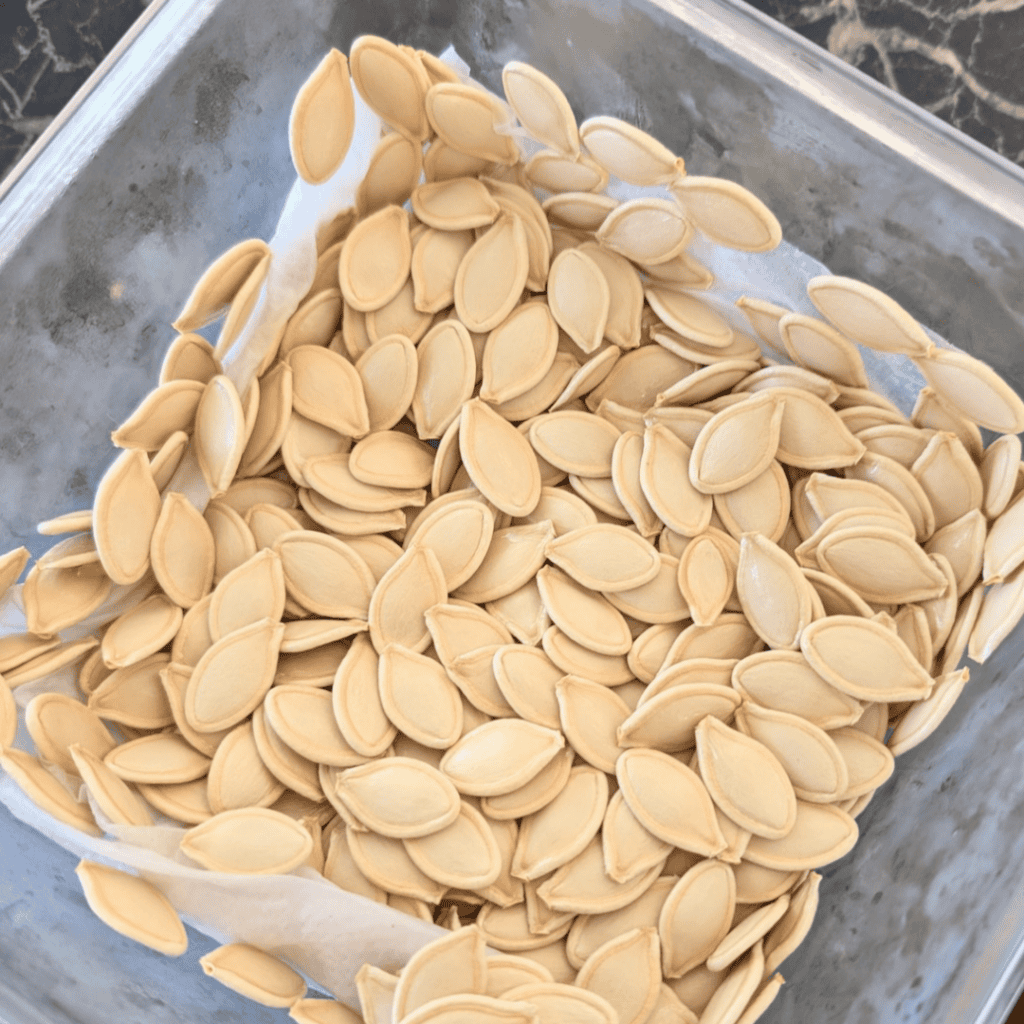
Spread the cleaned seeds onto clean, dry paper towel and use additional paper towel to gently remove as much surface moisture as possible.
You do not want the seeds still wet from rinsing when they go onto the baking sheet. Extra moisture makes it harder for the seeds to roast evenly.
Can You Clean Pumpkin Seeds Ahead of Time?
Yes.
If you are not going to roast the pumpkin seeds the same day, place clean, dry paper towel in the bottom of a glass or plastic container with a tight-fitting lid.
Lay the cleaned and dried seeds over the paper towel, cover the container tightly, and refrigerate them for up to two days.
When you are ready to roast them, check that there is no excess moisture sitting around the seeds before adding the oil and seasoning.

How to Roast Pumpkin Seeds in the Oven
Prepare the baking sheet
Preheat the oven to 325°F and position the rack in the center of the oven.
You can roast the pumpkin seeds directly on a baking sheet, but I prefer lining the sheet with parchment paper because it makes cleanup easier.
A larger baking sheet also gives the seeds more room to spread out.
Season the seeds
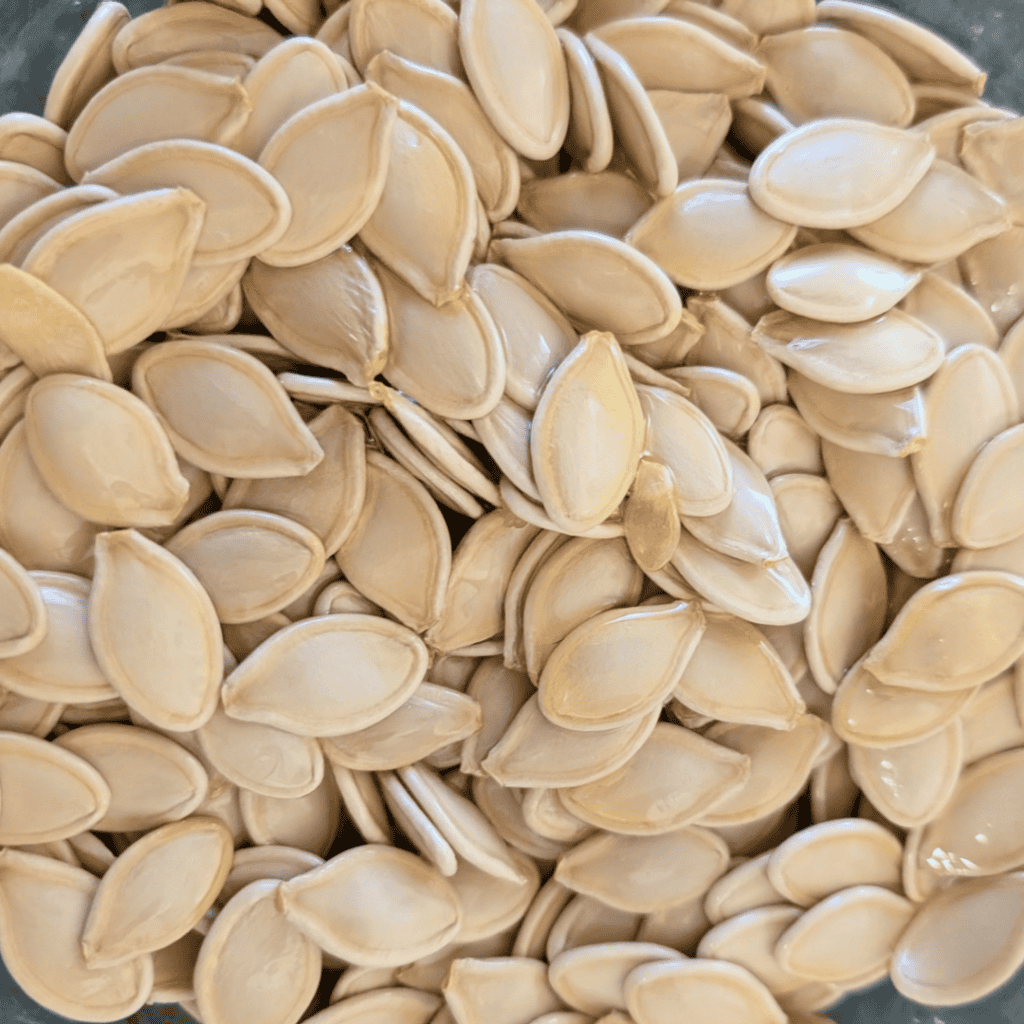
Place the thoroughly dried pumpkin seeds in a bowl.
Add 4 tablespoons of olive oil and 3 teaspoons of salt to 2 cups seeds, then stir until the seeds are evenly coated.
Spread the seeds into a thin layer
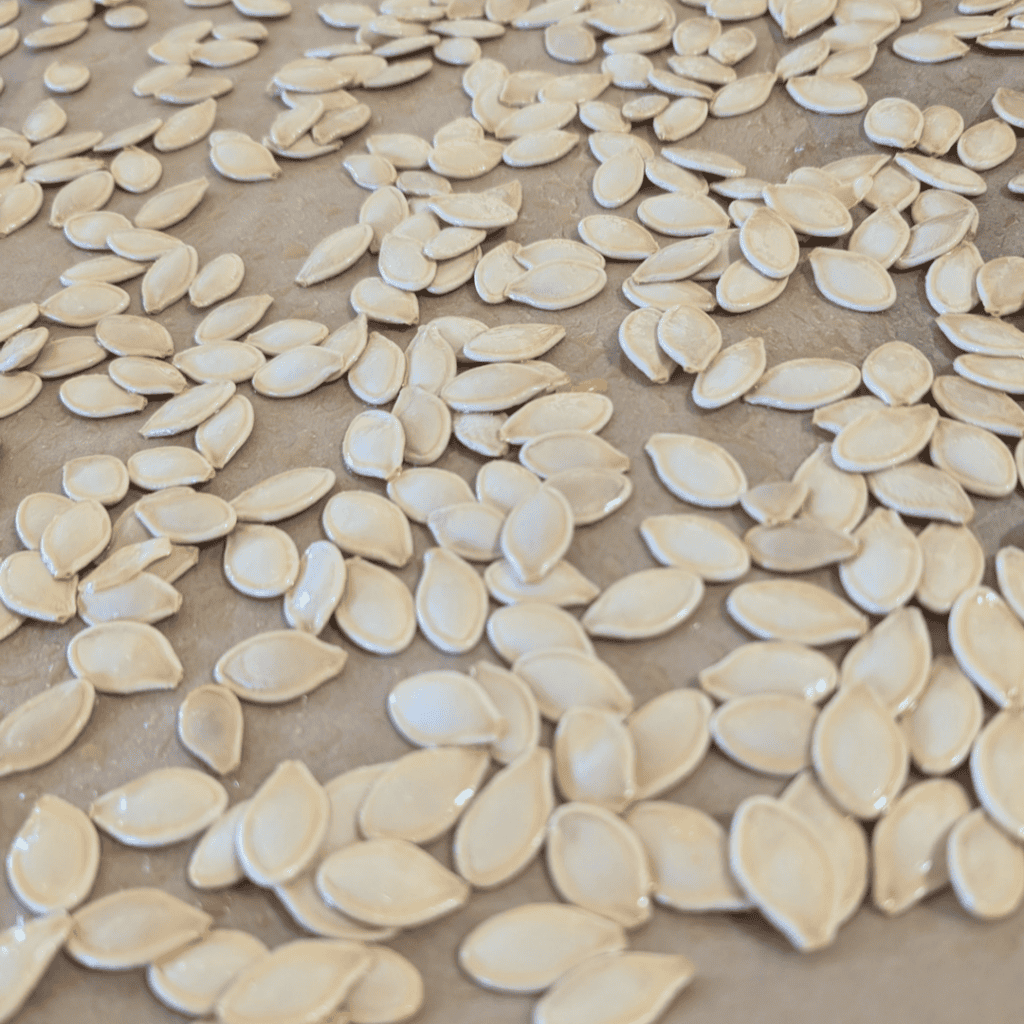
Transfer the seasoned pumpkin seeds to the baking sheet.
Spread them out into as thin a layer as possible. Ideally, the seeds should have a little space around them rather than sitting in large piles.
This is especially important with freshly washed pumpkin seeds because crowded areas hold more moisture between the seeds.
Roast at 325°F
Place the baking sheet on the center rack and roast for 15 to 20 minutes. Pumpkin seeds can vary in size depending on the pumpkin, so begin checking them toward the lower end of the baking time. Smaller seeds may finish sooner, while larger seeds may need closer to the full 20 minutes. Use their appearance rather than the clock alone to decide when they are done.
About halfway through roasting, give the seeds a quick stir or shuffle so that they roast more evenly.
I usually leave the baking sheet in the oven, open the door, and use a flat pancake flipper or spatula to move the seeds around quickly.
Try not to leave the oven door open any longer than necessary. The longer it stays open, the more heat escapes and the more the oven temperature drops.
Open the oven, stir the seeds, spread them back out, and close the door again.
Check for doneness
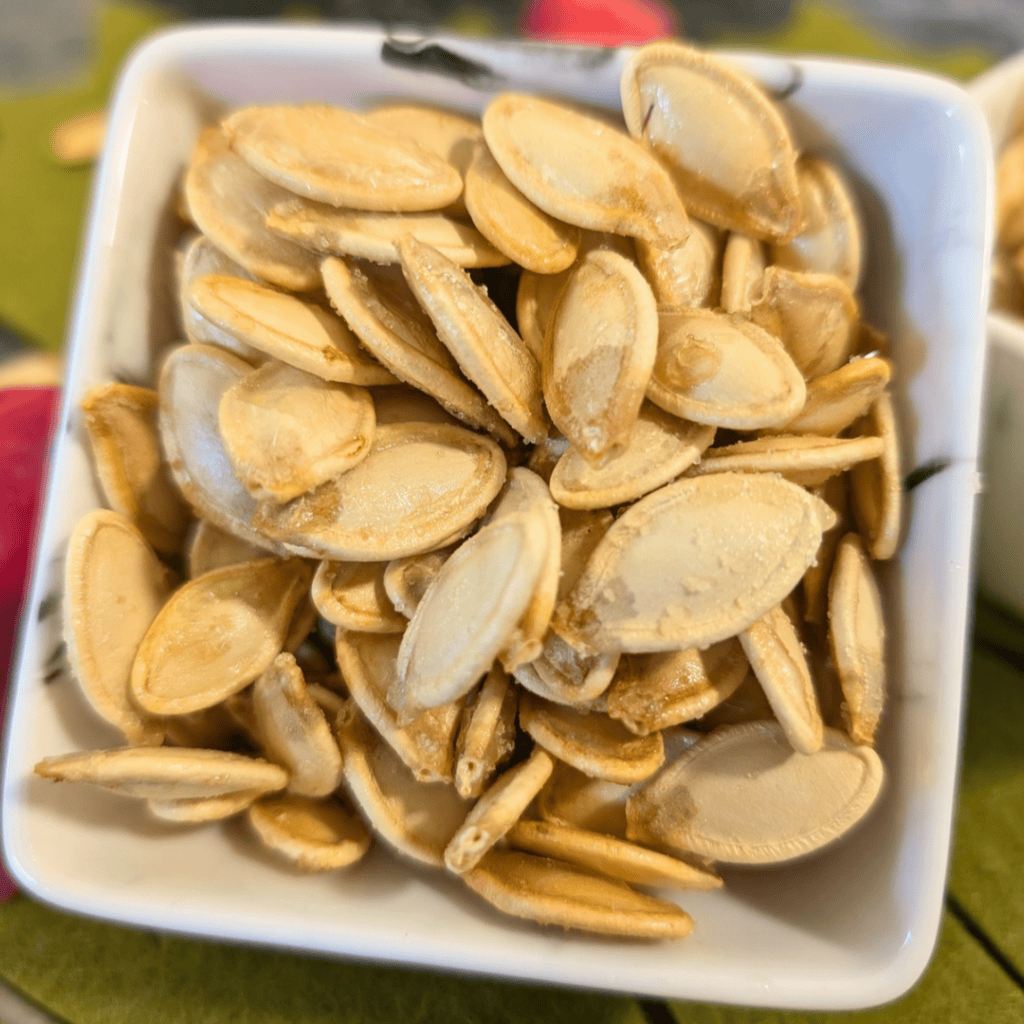
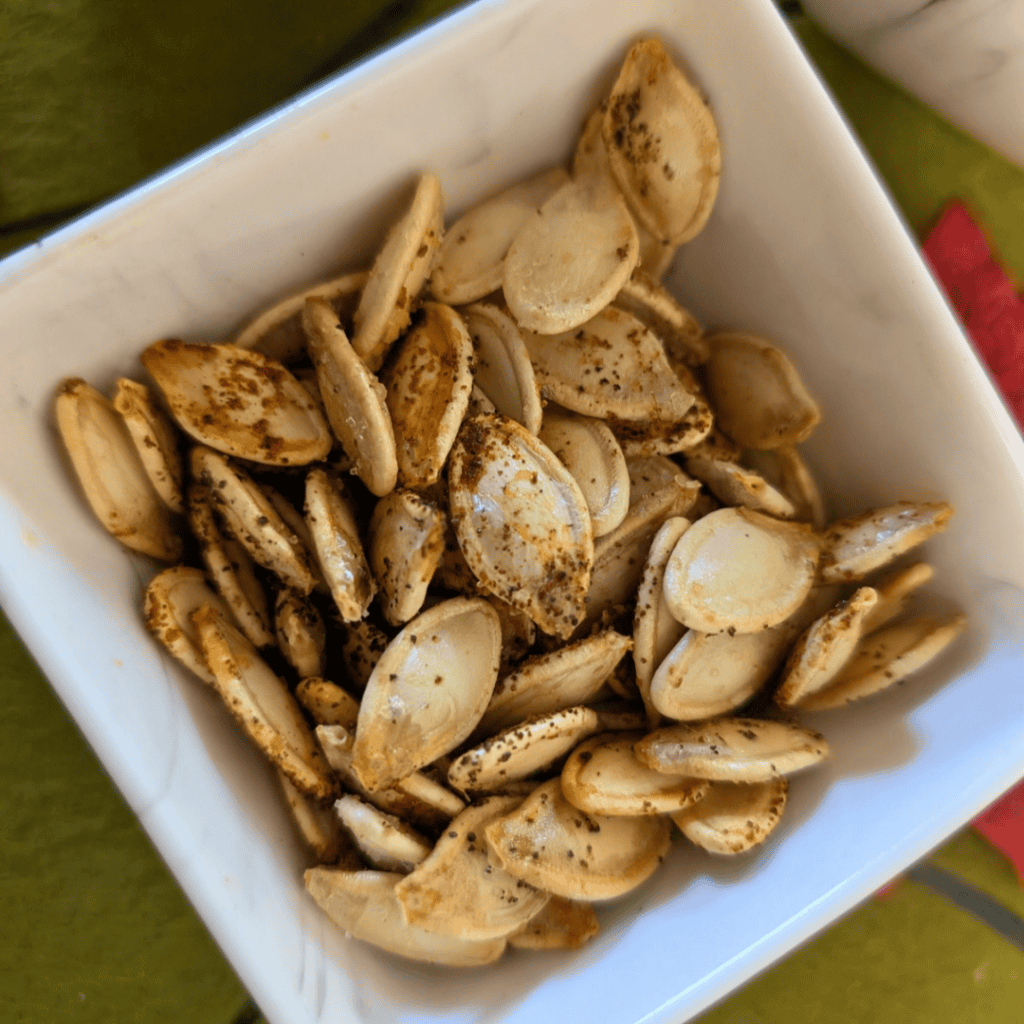
The roasted pumpkin seeds should look dry with a slightly toasted appearance.
They should not be turning dark brown or black. If they begin getting very dark, they have roasted too far.
Remove the baking sheet from the oven and allow the seeds to cool. They will continue to crisp slightly as they cool, so don’t keep roasting them until they are dark brown just because they still seem a little soft when they first come out of the oven.
Ingredients:
These basic roasted pumpkin seeds only require the fresh seeds from your pumpkin and two pantry ingredients.
Fresh Pumpkin Seeds: Use the seeds removed from a fresh pumpkin. Remove all of the stringy pulp, rinse them thoroughly, and dry them well before seasoning.
Olive Oil: Four tablespoons coat the seeds before roasting and help the seasoning cling to them.
Salt: Three teaspoons season the basic salted pumpkin seeds. You can keep the full batch salted or add additional seasonings to sections of the pan.
Pumpkin Seed Seasoning Ideas
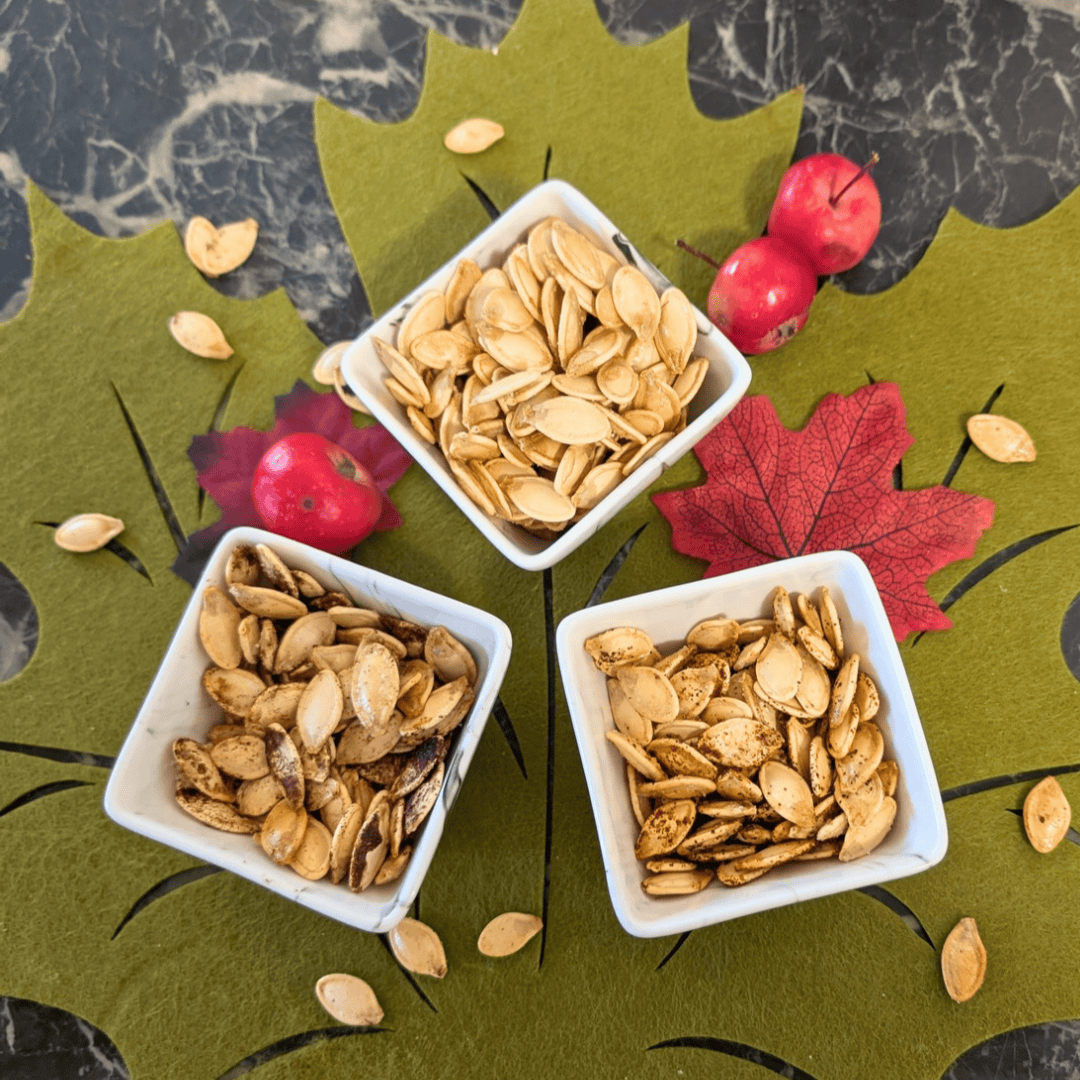
You can season the entire batch one way, but a large baking sheet also makes it possible to test several flavours at once.
I divide the sheet into sections and keep enough space between each flavour that they do not get mixed together when I stir them.
Classic Salted Pumpkin Seeds
Leave part or all of the batch seasoned simply with olive oil and salt.
This is the basic version and also gives you something to compare the other flavours against.
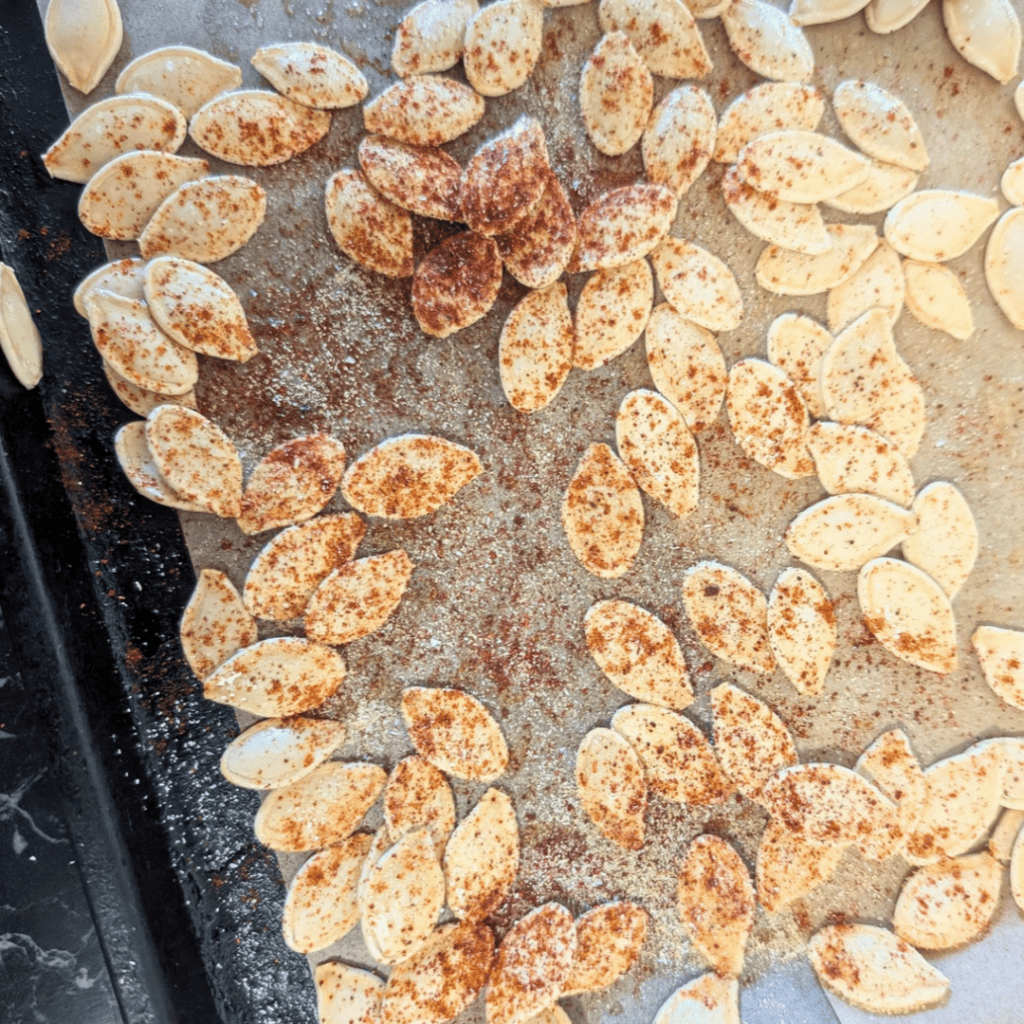
Smoky Savoury Pumpkin Seeds
Sprinkle a section of the salted seeds with:
- Smoked paprika
- Onion powder
This was my favourite of the seasoning variations I tried.
You do not need a complicated seasoning blend. A light sprinkle of smoked paprika and onion powder adds plenty of flavour alongside the salt.
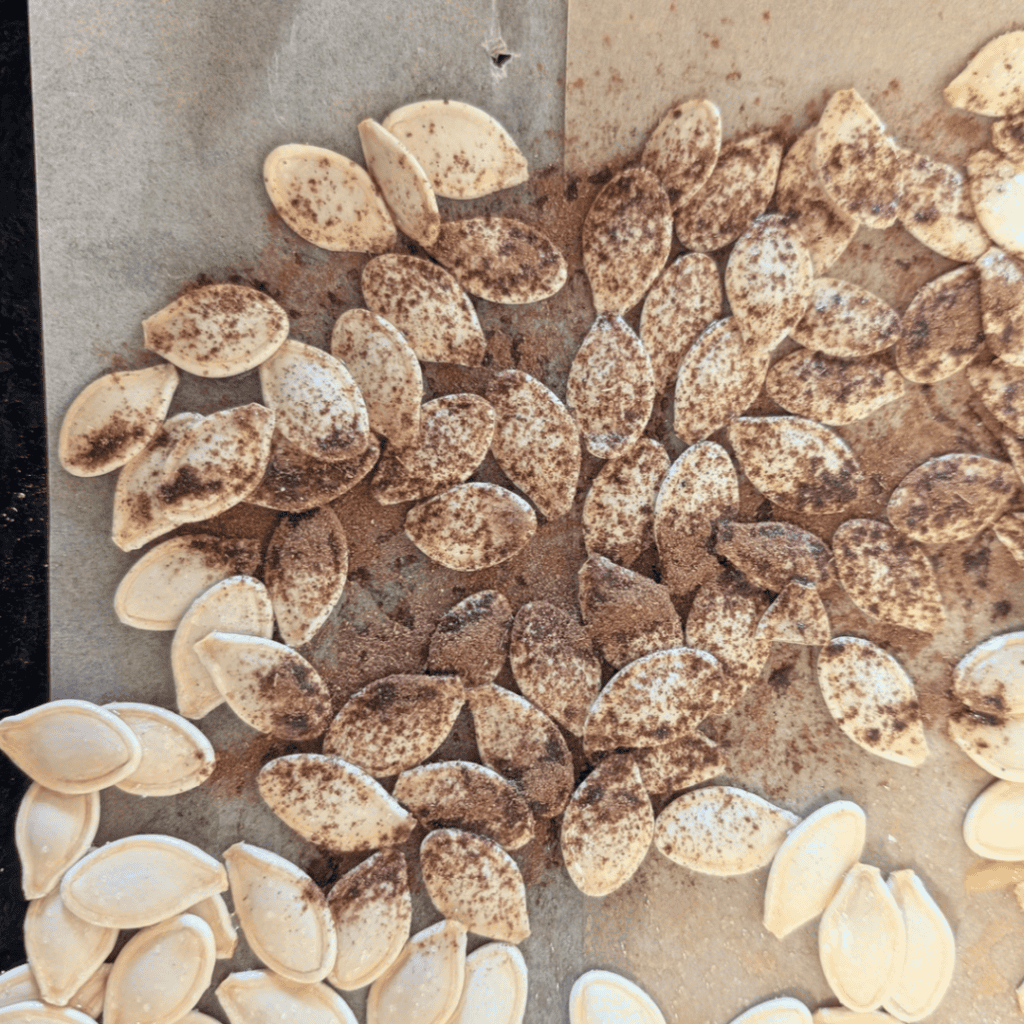
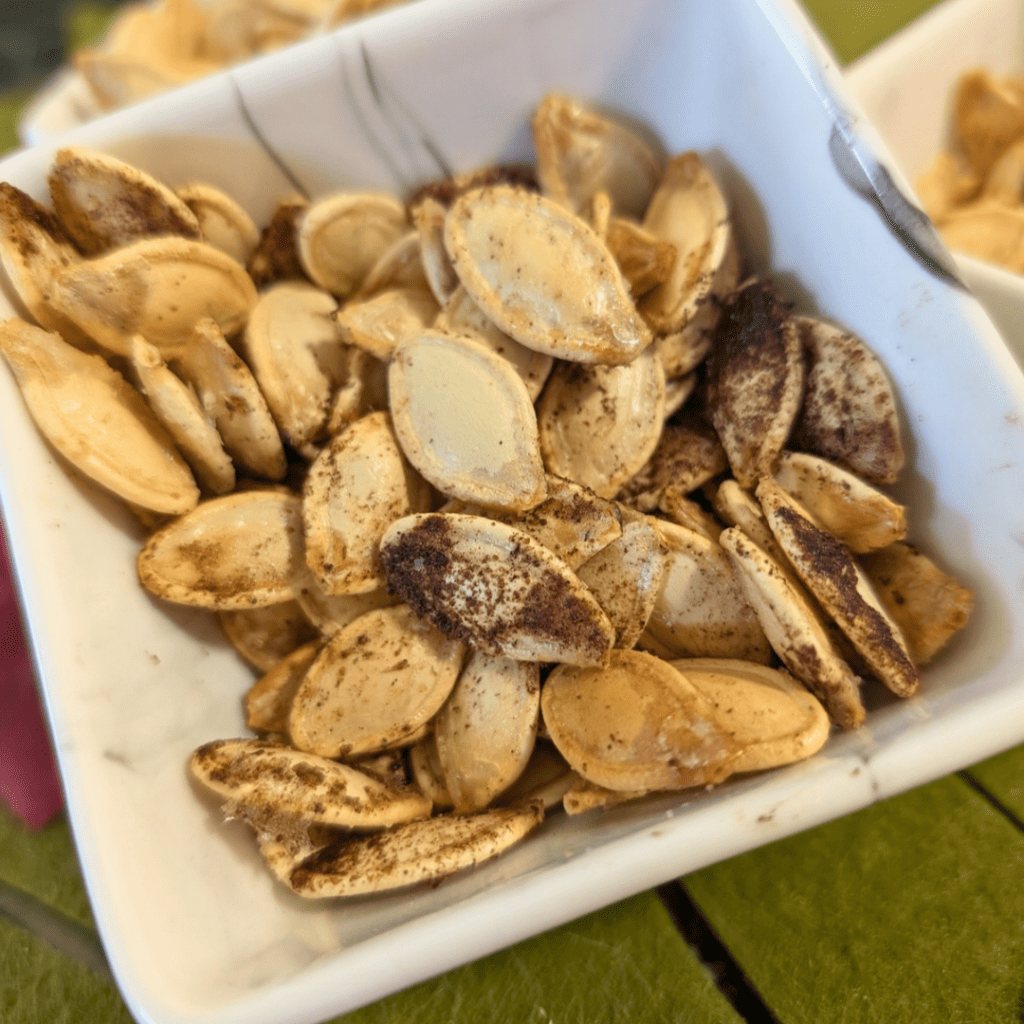
Sweet Pumpkin Spice Seeds
I also tested a small section with pumpkin pie spice but no sugar.
It was not my favourite version because the pumpkin pie spice needed some sweetness with it.
If I make that variation again, I would add a little white sugar along with the pumpkin pie spice before roasting.
That is a suggested adjustment based on the batch I made rather than a tested sweet version.
Roasting More Than One Flavour on the Same Baking Sheet
If your baking sheet is large enough, you do not need several pans to make different flavours.
Keep one section salted, then season smaller areas with the flavours you want to try.
When you stir the seeds halfway through roasting, work on one section at a time so you do not accidentally mix all of the seasonings together.
Spread each section back into a thin layer before closing the oven.
Substitutions and Add-Ins for Roasted Pumpkin Seeds
Fresh Pumpkin Seeds: This method is specifically for the fresh seeds removed from a pumpkin. Packaged pepitas or shelled pumpkin seeds are a different product and may need different roasting times.
Olive Oil: Another neutral cooking oil should also work for coating the seeds, although the flavour will change depending on the oil you use.
Salt: Reduce the salt if you prefer a lightly salted seed. Additional savoury seasoning can also be added alongside it.
Smoked Paprika: Regular paprika can be used if you do not want the smoky flavour, although the finished seasoning will be milder.
Onion Powder: Garlic powder would move the seasoning in a slightly different direction but can be used as another savoury option.
Pumpkin Pie Spice: Pair pumpkin pie spice with a little white sugar if you want a sweet-spiced seed rather than using the spice blend alone.
Expert Tips, Serving and Storing Suggestions
Tip #1: Dry the Seeds Well: Removing surface moisture before adding the oil helps the seeds roast rather than sitting in trapped moisture on the baking sheet.
Tip #2: Give Them Room: A large baking sheet makes it easier to spread the seeds into a thin layer. Avoid large piles of seeds whenever possible.
Tip #3: Stir Quickly: Stir the seeds halfway through roasting, but do not leave the oven door standing open. A quick stir helps keep the oven temperature more consistent.
Tip #4: Watch the Colour: The seeds should look dry and lightly toasted. Do not wait for them to become dark brown before taking them out of the oven.
Serving
Roasted pumpkin seeds can be eaten as a snack once they have cooled.
The salted or smoky savoury versions can also be used as a crunchy topping for soups or salads. I especially like this idea during pumpkin season because the seeds can be roasted while the rest of the pumpkin is being used for soup, puree, or baking.
Storing Roasted Pumpkin Seeds
Allow the roasted seeds to cool completely before storing them.
Keep them in a covered container for the next few days. Make sure the seeds are cool and dry before closing the container so you are not trapping steam inside.
FAQ
Don’t Throw Away the Seeds
When you are preparing a fresh pumpkin, set the seeds aside before you continue with the rest of the pumpkin.
Once they are cleaned, dried and spread properly on the baking sheet, roasted pumpkin seeds require very little hands-on work.
I usually keep at least part of the batch salted, but the large-sheet-pan method also gives you room to experiment without committing the whole batch to one seasoning.
If you used a different spice or seasoning blend on your roasted pumpkin seeds, let me know what you used in the comments. It may give someone else an idea for their next batch.
How to Roast Pumpkin Seeds in the Oven

Equipment
- Colander
- bowl
- parchment paper Optional
- baking sheet
- Tablespoon
- Teaspoon
- Spatula
Ingredients
- Pumpkin Seeds Removed from the pumpkin, cleaned and thoroughly dried
- 4 Tbsp Olive oil If you have less than a cup of seeds reduce to 2 teaspoon oil
- 3 Tsp Salt If you have less than a cup of seeds reduce to 1½ teaspoon salt
Instructions
- Preheat the oven to 325°F with the rack positioned in the center.
- Remove the seeds and pulp from the pumpkin. Place them in a colander and rinse under cool water, separating the seeds from the stringy pulp by hand.
- Transfer the cleaned seeds to a clean bowl as you work. Continue until all visible pumpkin pulp has been removed.
- Use clean, dry paper towel to thoroughly remove surface moisture from the seeds.
- Place the dried seeds in a bowl. Add the olive oil and salt and stir until evenly coated.
- Line a large baking sheet with parchment paper if desired.
- Spread the seeds over the baking sheet in a thin layer, avoiding large piles and leaving some space around the seeds where possible.
- Roast on the center rack for 15 to 20 minutes.
- Stir or shuffle the seeds halfway through roasting, then spread them back into a thin layer.
- Remove the seeds once they are dry and lightly toasted. Do not allow them to become dark brown or black.
- Allow roasted pumpkin seeds to cool completely before storing them in a covered container for the next few days. The seeds will continue to crisp slightly as they cool.
Notes