Fudge Cake With Strawberry Filling
This fluffy fudge cake with strawberry filling and old-fashioned chocolate butter icing is so sinfully delicious. It’s incredibly soft and fluffy, made with cocoa powder and both white and brown sugar. The rich chocolate flavor is balanced beautifully with the old-fashioned simple chocolate butter icing. Frozen strawberry fruit filling makes a quick and flavorful change from the average buttercream filling. You will love making this chocolate cake recipe to celebrate birthdays and other special events.
When you’re known as the baker in the family, you get asked to make things often. Chocolate cake with strawberry filling is a favorite of my partners. When asked to make the old stand-by version with jam filling, I made it better with a natural fruit filling. Adding fruit filling keeps the cake moister longer, and strawberries and chocolate need to say more? Without much butter left before grocery day, I devised an alternate option using one we used as kids.
The old-fashioned chocolate butter icing only uses three tablespoons of butter! It’s smooth, chocolatey, and the most delicious topping for this moist chocolate cake.
If you love chocolate cake try our Layered Fudge Cake With Walnut Butter Buttercream Filling~simply omit the cranberry from the decoration and enjoy any time of the year!

What you will love about this recipe.
Simple ingredients. We don’t use anything fancy in this recipe, and it makes a delightful homemade chocolate cake that everyone will love.
Semi-naked icing. When you only frost the top of the cake, it makes it much easier as an amateur or beginner cake decorator. It also allows people to see the strawberry filling peeking out from the sides of the cake.
Fluffy cake. It’s as light as air. In fact, this cake recipe rivals the boxed cake mixes and comes out on top with superior flavor.
No special tools are needed. You don’t need a stand mixer to make this cake. In fact, I’ve always just used a fork to fold batter and remove lumps. It works perfectly fine and results in a light, fluffy cake.
Birthday cake. It’s the best chocolate cake for a birthday cake. Make a lovely two-layer cake that you can quickly frost with vanilla or chocolate frosting.
How do we make it?
Let’s be honest: The most daunting thing about making a cake from scratch is waiting for it to cool. It’s a lesson in patience because you don’t want to try to frost it when it’s warm, especially with butter icing, as it will melt right off. The first thing to do is get the cake into the oven, and then we can work on the filling and the icing.
So, let’s start by getting out two mixing bowls. One will need to be larger because it will end up with all the cake batter. The other bowl can be smaller as we will only mix the dry ingredients in it.


When making a cake, we always cream the butter and sugar together. Then add in your eggs and mix well. You can measure the dry ingredients in the other bowl, including the cocoa powder. When you use cocoa powder in a recipe, adding a splash of extra oil is good. That’s why you see the plus three tablespoons of oil in the recipe card.


Now that you have the dry blended dump it into the wet ingredients in the large bowl. Then, as you mix, add the whipping cream and hot water. This batter will be thicker and less thin than a boxed cake mix. I used two 9-inch cake pans for the batter, and it barely made a dent in the pans because mine are deeper than average. It looked like it wouldn’t bake up correctly because it didn’t fill the pans. But I was pleasantly surprised as it did. If you want to have the cake layers deeper than mine, you can use smaller round pans. Adjust the bake time as needed since the batter will then be deeper.


Prepare your cake pans for baking the cake. I recommend the parchment paper round method to avoid the cake stick. I am sure that’s not the technical term, but that’s what I am calling it. You will cut a round of parchment paper to fit the bottom of each pan. Then spray the whole pan, paper included, with cooking spray. This will ensure your cake doesn’t stick, and you will not suffer ripped cake bottom syndrome. Which I can tell you from the many years of baking is enough to make one cry.

Bake the cakes in a 350F oven for 30-35 minutes or until the cake tester shows you it’s done. No cake tester? No problem, let’s go old school. Using a butter knife, insert into the deepest part of the cake; only if it appears done. You can tell if it looks done because the cake will not be wet-looking, and the sides will pull back from the pan. If you use this method too early, the cake will fall in the center. If the butter knife comes out clean, then the cake is done. If it comes out sticky, you need to continue to bake for a few more minutes. Once fully baked, remove the cake from the oven and let it cool in the pans.


Now, let’s focus on making the strawberry filling. This process is simple and economical, which is always good when grocery prices are high. We use two cups of frozen sliced strawberries. Frozen berries are great for a few reasons. One, they usually cost less than fresh. And two, you can use them just as easily in your baking. So, unless I want fresh fruit, I generally opt for frozen. That said, we are putting two cups of berries in the saucepan. Since ice is already in the frozen fruit, we will only add one-quarter cup of water to keep them from drying out. After all, a good filling isn’t just fruit but also a sweet, thickened filling.
We will add our white sugar to this cooking fruit and let it dissolve. While it’s starting to boil on medium-high heat, we can work on breaking the now-softened berries up. Unless you prefer large chunks. I broke my sliced berries into smaller pieces. It makes the filling have more fruit coverage easier.

Once the mixture has reached a rolling boil, we add a cornstarch slurry with cold water. That thickens the whole mix in about a minute, and you can remove it from the heat and set it aside to cool. To speed up cooling, you can put it in the fridge. I have an open window to set it in front of, making cooling baking easier.
You can now work on the icing. It’s a straightforward chocolate butter icing with three tablespoons of butter, icing sugar, cream/milk, salt, vanilla extract, and cocoa powder. You have to blend it until smooth. Working with softened butter will make the mixing easier. Keep this at room temperature so it’s easy to spread over the top of the cake.
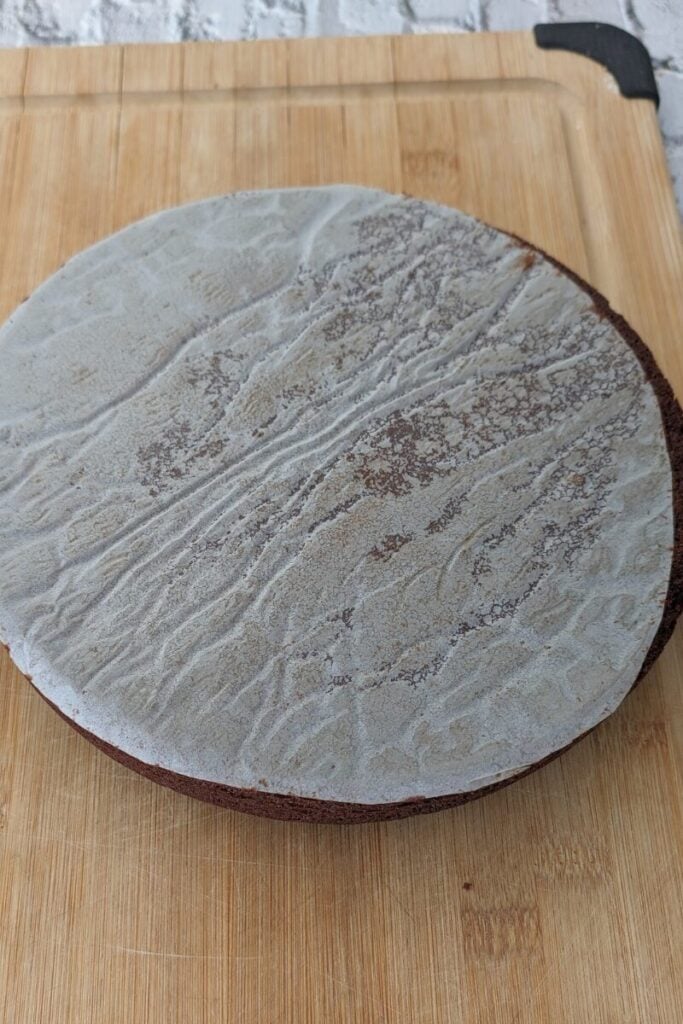

Once the cake has cooled completely, turn the first cake out on the cake plate or work surface you wish to use. The parchment paper will be easily removed from the bottom of the cake, and then you can spread the filling on it. (If you find the cake is too rounded and want it to be flat on the cake plate, flip it over and cut off the dome with a cake or bread knife.) Start with one generous spoonful in the center, working your way outwards. You want to ensure you leave one inch bare around the outside, or it will ooze out, making a big mess. Try to add as many of the fruit pieces as you can. You will likely have some filling left over. No worries, there is likely some sweet tooth in the house who will be only too happy to eat that up for you.


Now, you can turn the other cake out and remove the cake paper from the bottom again. This time, we are laying the bottom of the top on the fruit-covered layer. You can now ice the top of the cake with the chocolate butter icing. Feel free to be as creative with the icing as you wish. This icing is great for experimenting with designs and can easily be reworked this way or that. Again, this is a semi-naked frosted cake, so we aren’t icing the sides of the cake.
Do you feel like it needs a bit more decorating? Try adding shaved chocolate to the top or some candy sprinkles for vibrancy. Enjoy a big slice of this incredible cake for your next after-dinner dessert or birthday party celebration.
Ingredients:
Butter: Contributes to a tender and moist crumb. It also creates a slightly denser texture than oil, giving the cake a more substantial feel.
Vanilla: Acts as a flavor enhancer that smoothens out the taste.
Brown Sugar: The molasses in brown sugar can undergo caramelization during baking, adding another layer of flavor and complexity to the fudge cake. It also adds moisture and tenderness to the finished cake.
White Sugar: Helps with the texture and structure of the cake and sweetens it further.
Eggs: Eggs play a crucial role in fudge cake recipes, contributing to the structure, texture, and overall richness of the cake.
Cocoa Powder: Also adds the structure of the chocolate cake. It, of course, also brings in the chocolate flavor that we know and love in a fudge cake.
Boiling Water: Is needed to activate the baking soda in this recipe. It is often used in fudge cake recipes to balance the overall consistency of the batter. It ensures that the dry and wet ingredients are well incorporated, preventing the cake from being too dry or too dense.
Flour: All-purpose flour provides a consistent and reliable outcome in fudge cake recipes.
Salt: Aids in flavor enhancement and balances the sweetness while creating a deeper chocolate flavor to the cake.
Baking Soda: When paired with the acid in the cocoa powder, this ingredient becomes a leavening agent that helps the cake rise.
Whipping Cream: Contributes to a richer, more indulgent texture and flavor.
Powdered Sugar: In icing, this fine confectioner’s sugar will dissolve, making for a smooth, creamy consistency.
Strawberries: This frozen fruit can be whole or sliced, making a delicious fruity filling for the fudge cake.
Cornstarch: Cornstarch-thickened fruit fillings have good stability, maintaining their thickness even after cooling. This stability is essential for ensuring the filling remains well-set when the cake is sliced and served.

Substitutions and Add-In Ideas For This Chocolate Strawberry Cake:
Butter: Salted or unsalted butter will work fine in this recipe; I used salted. It can be switched out for oil or margarine if you prefer. Note that buttery flavor adds a richness to the cake that will not be present. Instead, neutral oil, like canola or vegetable oil, will produce more chocolate flavor as the cocoa will not be dulled by the butter’s creaminess.
Vanilla: It can be omitted altogether if you find yourself out of it. Alternatively, you can add in strawberry extract or almond extract.
Brown Sugar: Using solely brown sugar can result in a cake with a more pronounced and complex taste.
White Sugar: White sugar is pure sucrose and has a neutral sweetness. If you use solely white sugar, the cake may have a less complex flavor and sweeter taste, with less depth and complexity. Try switching out the sugars for a straight 1:1 ratio with coconut sugar. The flavor will have a richer and more complex profile than white sugar, and the coconut undertones can add a pleasant tropical twist.
Whole Eggs: Can be switched out for an egg substitute if you have an egg allergy. There are several that could work in this fudge cake. Silken tofu, vinegar, baking soda, and applesauce make good options. When using egg alternatives, remember that the cake’s texture and taste may vary slightly from the original recipe.
Unsweetened Cocoa Powder: Can be removed and replaced with three squares of baker-melted chocolate. You will also want to reduce the oil content by removing the three added tbsps mentioned in the recipe card.
Flour: While I used all-purpose cake flour because it’s a budget-friendly choice, you can use cake flour or even oat flour, made by grinding oats, which is a whole-grain option that adds a slightly nutty flavor. It’s a good choice for a fudge cake if you’re looking to incorporate whole grains.
Whipping Cream: Can be replaced with whole milk, but the cake will have varying results. Another option is to substitute the whipped cream with sour cream or plain Greek yogurt.
Strawberries: Not feeling like a strawberry filling. Using the instructions for the fruit filling, try making raspberry, blueberry, or blackberry cake filling instead. All of which go great with chocolate.
Cornstarch: Can be replaced if you have none in the pantry for a flour-water slurry. Whisk the flour and liquid together until you have a smooth, lump-free slurry. Gradually add the flour slurry to the hot fruit mixture on the stove. Stir continuously to prevent lumps and ensure even distribution of the thickening agent.
Note: Old-fashioned chocolate butter icing differs from chocolate buttercream frosting, which is often more fluffy. Butter icing tends to be heavier and less sweet. It also has significantly less butter than buttercream frosting. You can replace the frosting with a sweet cream cheese frosting or straight vanilla.
Expert Tips and Serving Suggestions:
Tip #1: For best results, prepare your cake pans properly. Whether you use a parchment paper round, as mentioned above, or one of the other great methods available, you must be sure the pans are prepared.
Tip #2: Don’t open the oven too soon. Every time you open an oven mid-bake, you reduce the oven temperature. Prolonged or frequent door openings can result in uneven baking and affect the overall quality of your cake.
Tip #3: Ensure the cake has thoroughly cooled before filling or icing. It will melt the butter in the butter icing if it’s not entirely cool. Too warm of cake can also thin the thickened fruit filling, making it run all over.
Tip #4: Decorating a cake can result in crumbs on the cake plate. Use a basting brush to whisk unsightly crumbs away from your work.
Serve a slice of this cake at your child’s next birthday party or as an after-dinner treat with a cup of hot coffee. Scoop some vanilla ice cream alongside for a tremendously delicious dessert the whole family will love.
Leftover cake can be stored in a cake container or covered with plastic wrap in the fridge. It can be kept covered properly in the refrigerator for up to five days. You can also store it in a cake container or covered cake plate directly on the counter. It will be fine as the filling has no egg, and the old-fashioned chocolate icing is made with butter.
If you enjoyed this fluffy fudge cake with strawberry filling, we would love to hear about it. Leave a comment below the recipe card if you test this recipe. As always, we love hearing from you, our readers!

Fluffy Fudge Cake With Strawberry Fruit Filling and Old-fashioned Chocolate Butter Icing
Equipment
- 1 Large Mixing Bowl
- 1 Medium Mixing Bowl
- Measuring Cups
- 1 Tablespoon
- 1 Teaspoon
- 1 Small Saucepan
- 1 Cake tester
- 2 9" or smaller round cake pans
- parchment paper
Ingredients
Fudge Cake Batter
- ½ Cup Butter
- 1 Cup Brown Sugar
- ½ Cup White Sugar
- 2 Lrg Eggs
- 1 Tsp Vanilla Extract
- 2 Cup Flour
- ¼ Tsp Salt
- 1 Tsp Baking Soda
- 3 Tbsp Cocoa Powder
- 3 Tbsp Vegetable Oil
- ½ Cup Hot Water
- ⅔ Cup Whipping Cream
Strawberry Fruit Filling
- 2 Cups Frozen Strawberries Sliced
- ¼ Cup Water
- ½ Cup Sugar
- 2 Tbsp Cornstarch
- 2-3 Tbsp Cold Water
Old-Fashioned Chocolate Butter Icing
- 3 Tbsp Butter
- 2 Cups Icing Sugar
- ½ Tsp Vanilla Extract
- 3 Tbsp Cocoa Powder
- Dash of salt
- 2-3 Tbsp Cream or Milk
Instructions
Making the Fudge Cake Batter
- In the large mixing bowl cream butter with sugars.
- Add in egg and vanilla mix well.
- In medium mixing bowl measure the dry ingredients and blend thoroughly.
- Add into the wet ingredients the oil. Mixing well.
- Dump the dry ingredients into the large bowl with wet ingredients. Start mixing.
- Add in the hot water and whipping cream beating after each addition.
- When batter is no longer lumpy divide equally between prepared cake pans.
- Bake in 350℉ oven for 30-35 minutes. Test for doneness.
To Prepare Cake Pans
- Cut a parchment paper round to fit the bottom of cake pans.
- Spray each pan including the paper with cooking spray.
The Strawberry Fruit Cake Filling
- In a small saucepan add the frozen, sliced berries.
- To that add the water and sugar.
- Stir on medium high until it reaches a rolling boil.
- Chop/mash strawberries as it cooks into smaller pieces.
- In measuring cup measure the cornstarch and the water. Mix well.
- Add the cornstarch slurry to the fruit mixture and allow to cook until thickened.
- Remove from heat to cool completely.
Old-Fashioned Chocolate Butter Icing
- Mix the butter and icing sugar in small bowl with vanilla.
- Add in the cocoa powder and continue to blend. The mixture will be very stiff.
- Adding one spoonful at a time add the cream/milk to the icing.
- Keep adding the cream/milk one spoon at a time until desired consistency has been reached. Icing should be spreadable but not runny.
Assembling the Fudge Cake
- Turn the first cooled cake layer out onto work surface and peel off parchment paper. If you wish it to lay flat use a cake knife to cut the dome of the cake off.
- On the bottom/flat side of the cake spread some of the cooled strawberry fruit filling. Working from the center out and leaving one inch space around the cake edge.
- Turn out the other cake layer removing parchment.
- Place on top of the fruit filling flat side down.
- Frost the top of the cake leaving the sides bare.
- Optionally decorate with shaved chocolate or other decoration.